Use the Run Test function to perform a full write-read verification of your LTO tape, then submit the results directly to Symply Support without leaving the app.
TABLE OF CONTENTS
- Overview
- Step 1 — Select your drive and load a tape
- Step 2 — Open Run Test and review the warning
- Step 3 — Acknowledge data erasure and start the test
- Step 4 — Wait for the test to complete
- Step 5 — Review the result
- Step 6 — Submit to Support
- Option A — Create a new support ticket
- Option B — Add diagnostics to an existing ticket
- Step 7 — Submission confirmed
- Frequently asked questions
Overview
Run Test is the most comprehensive diagnostic SymplyATOM2 can perform on your tape drive. It runs IBM's standard diagnostic sequence — the same test used by tape drive engineers — and checks the drive's mechanical, electronic, and data-handling systems in a single pass.
The test works through several phases automatically: it checks the drive's temperature, loads the tape, performs repeated write-and-read cycles to exercise the tape-threading mechanism and verify data accuracy, runs a hardware self-test of the drive's internal electronics, and measures read/write performance against the manufacturer's thresholds. It finishes by collecting any fault codes and internal diagnostic logs from the drive.
The process typically takes 10-20 minutes depending on your drive and cartridge generation. The drive will be fully occupied during this time. When the test completes, SymplyATOM2 saves a results file that can be uploaded directly to a new or existing support ticket in a single step.
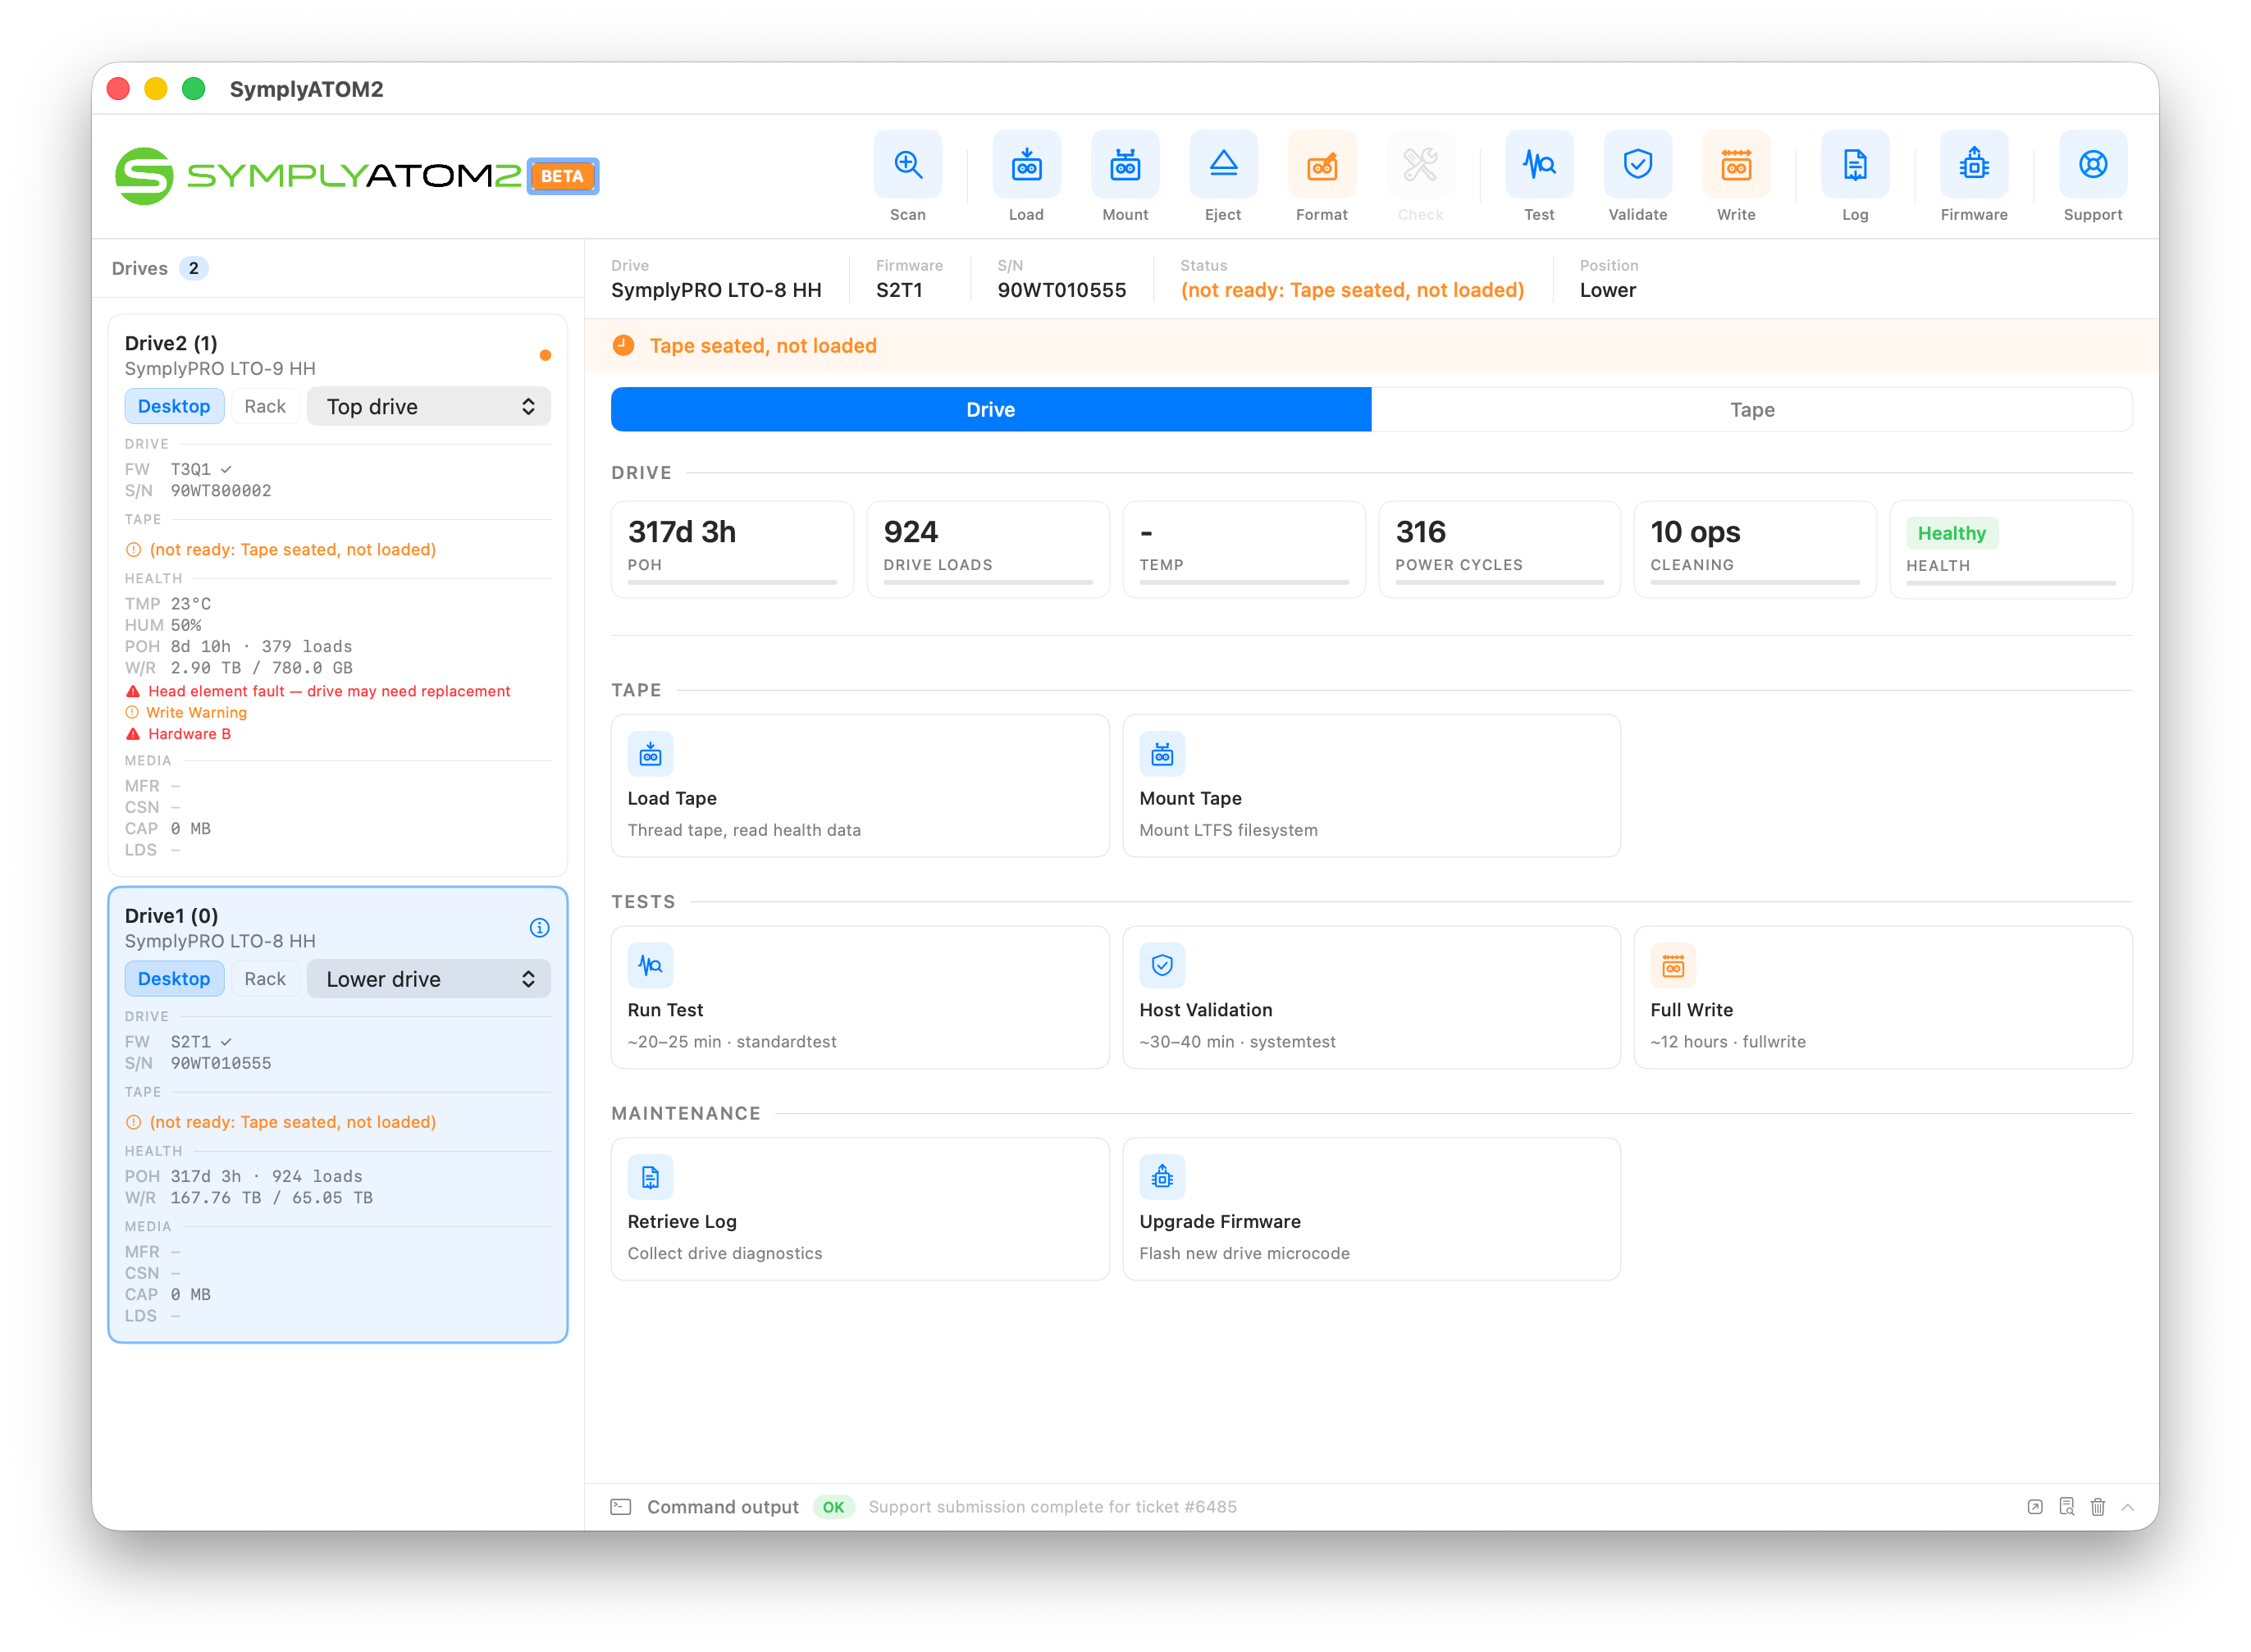
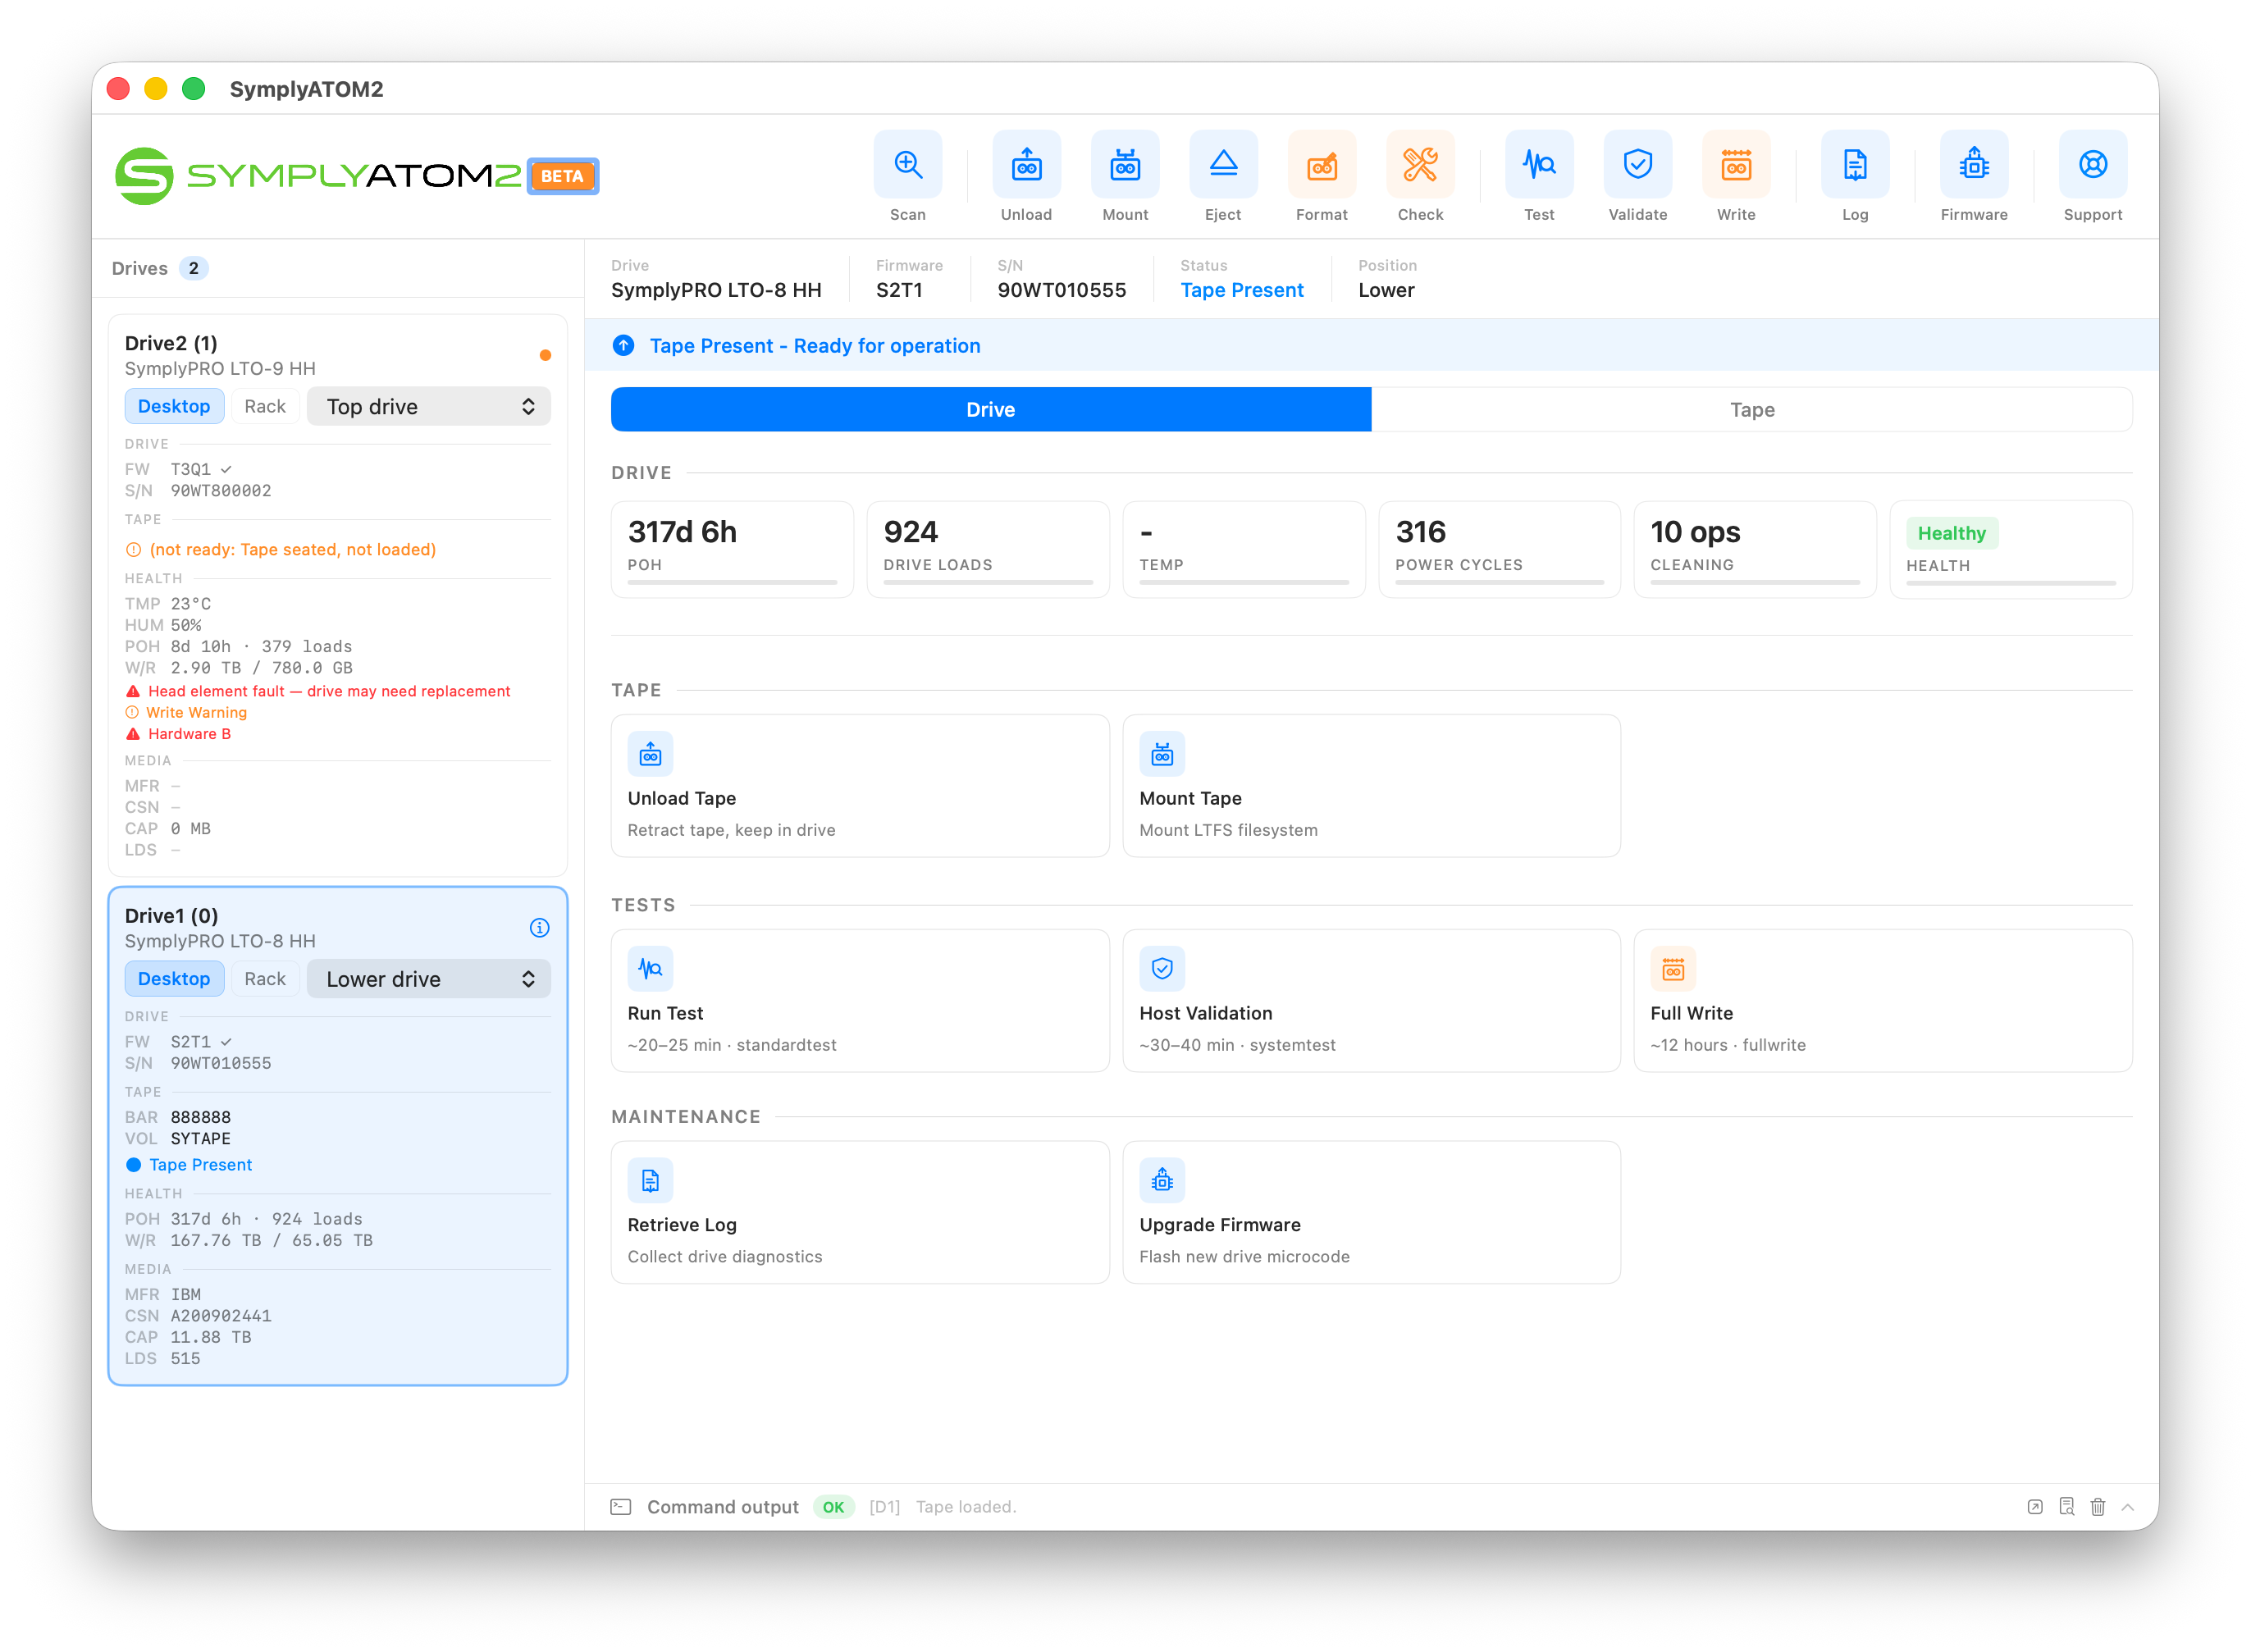
Step 1 — Select your drive and load a tape
Step 2 — Open Run Test and review the warning
Scroll down to the Tests section and click Run Test. A confirmation sheet will appear showing the drive details and a clear warning that all data on the tape will be permanently erased.
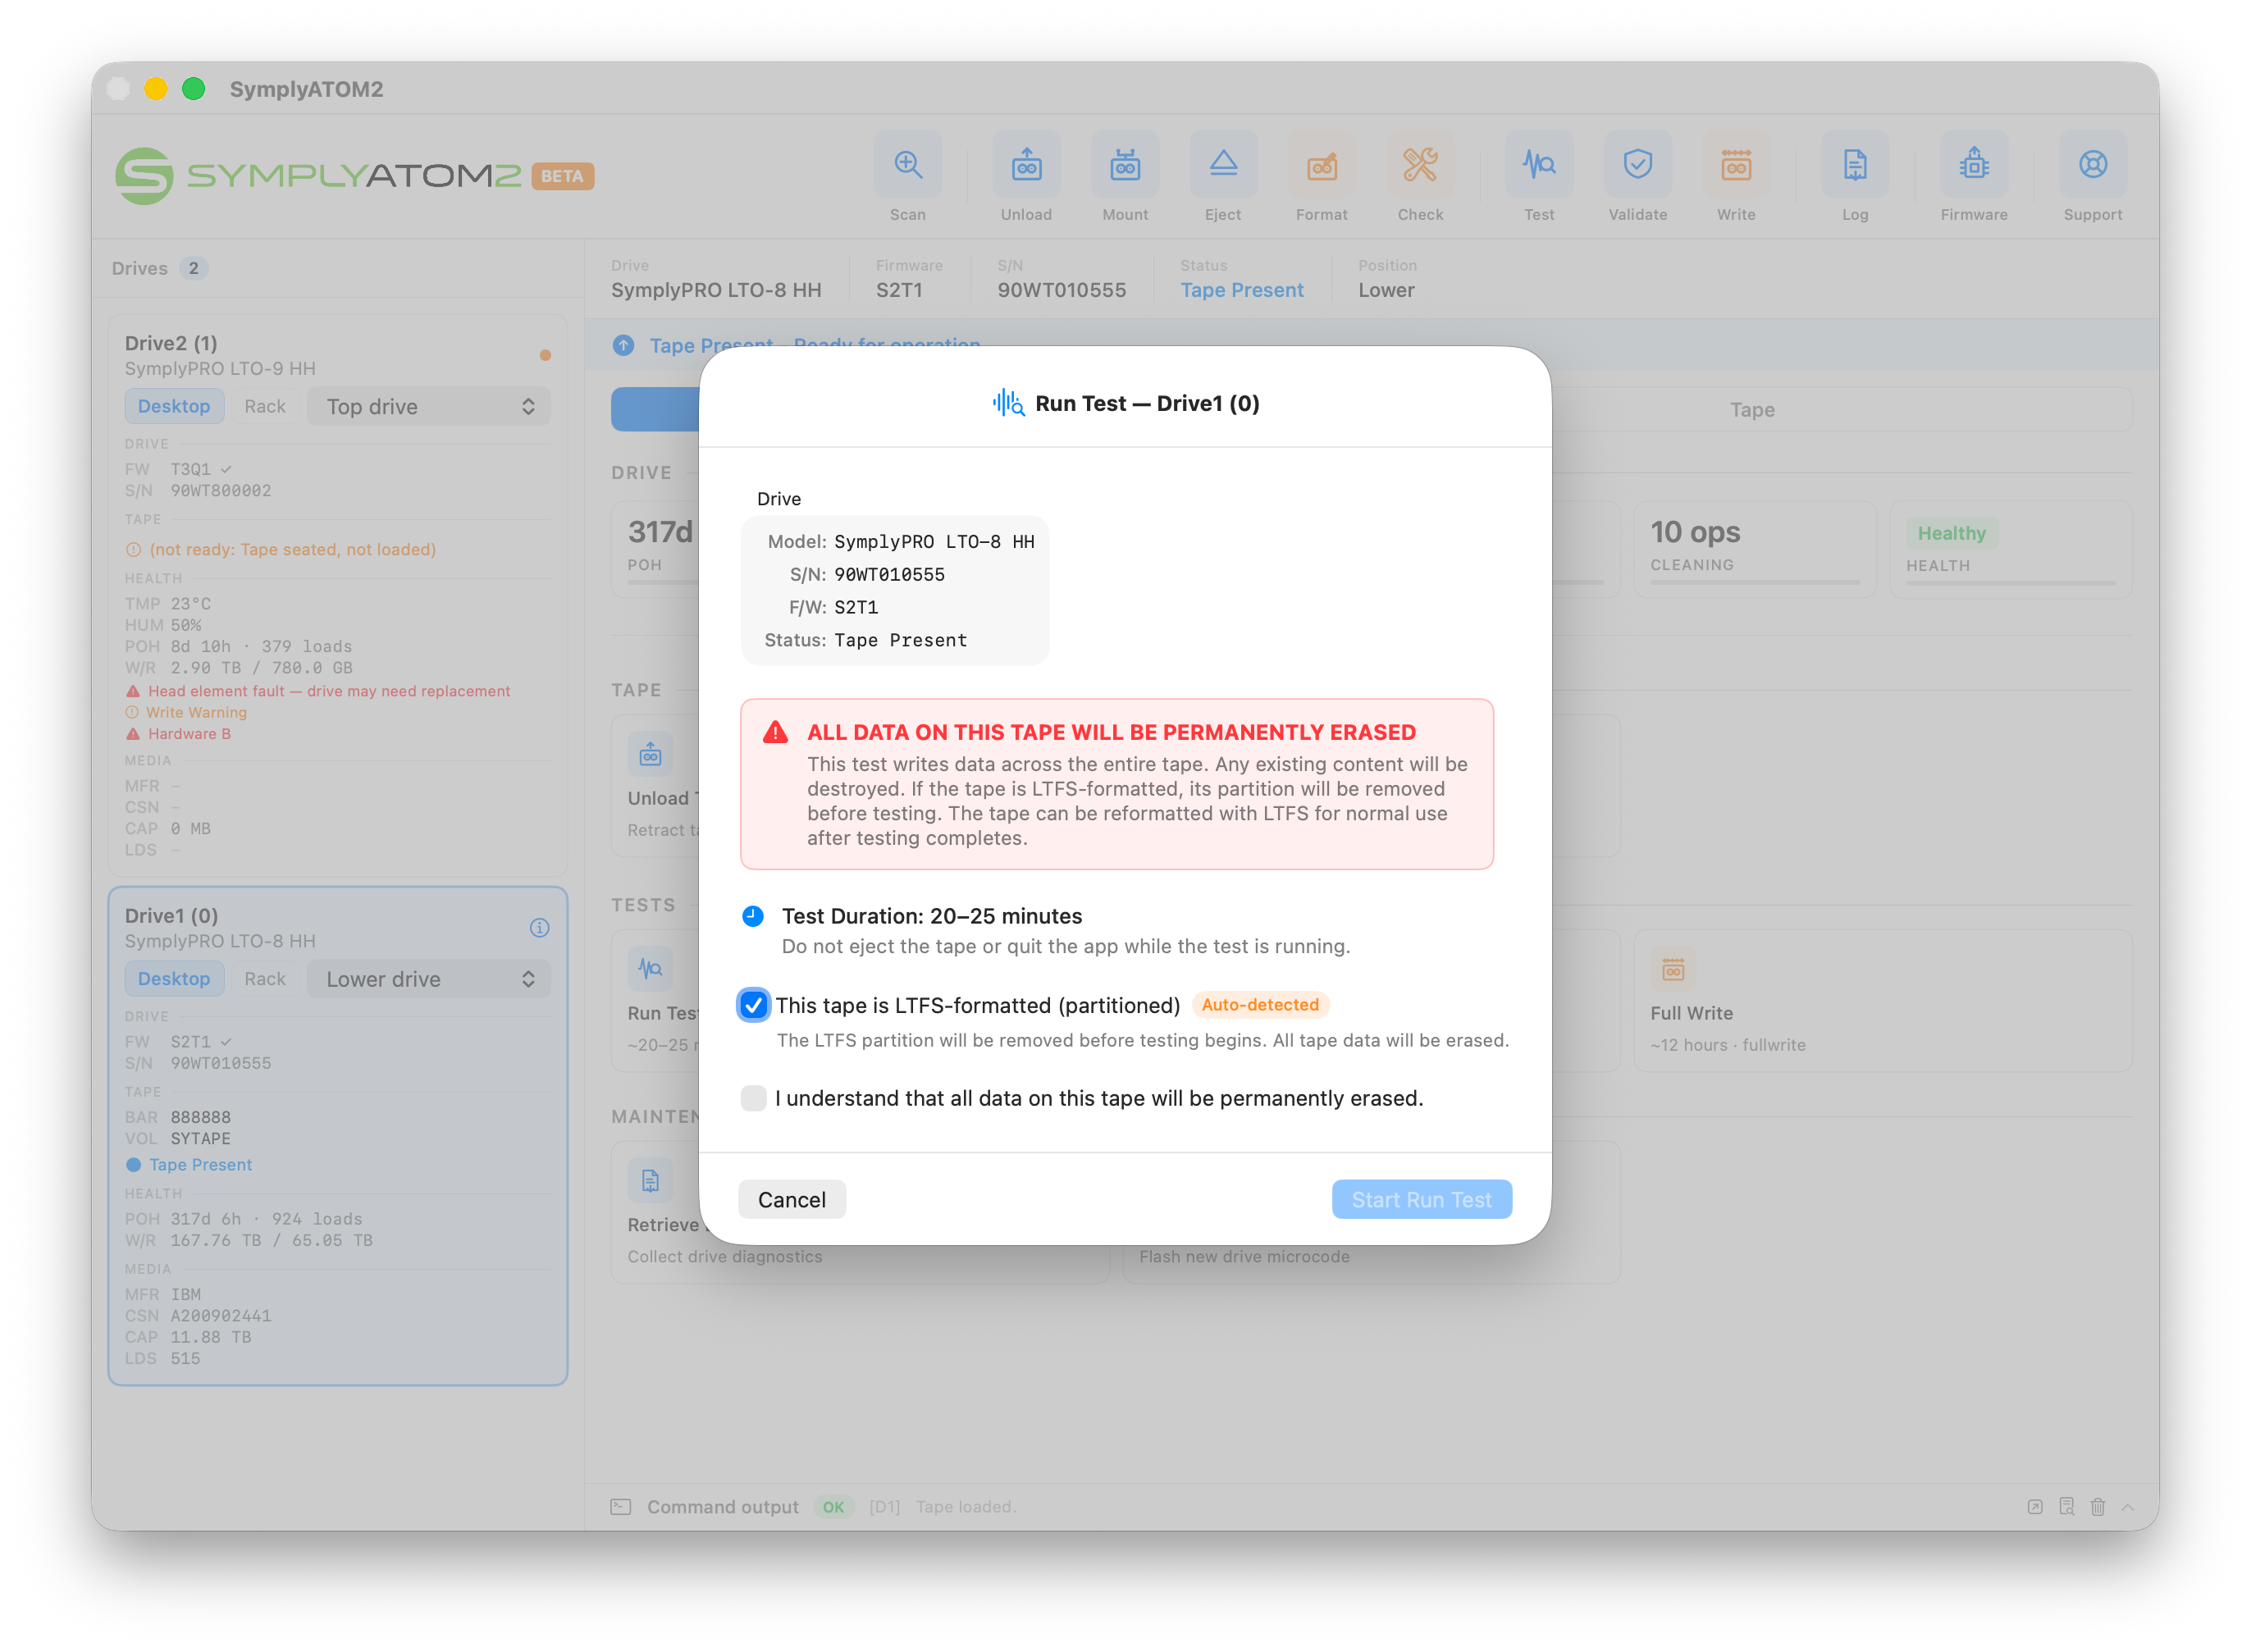
Take note of the following information shown in the sheet:
- Drive — confirms the drive model, serial number, and firmware version the test will run against.
- Status: Tape Present — confirms a tape is loaded and ready.
- Test Duration: 20–25 minutes — do not eject the tape or quit the app while the test is running.
- This tape is LTFS-formatted (partitioned) — if shown with an Auto-detected badge, the tape contains an LTFS partition that will be removed before testing begins. A second confirmation will appear in the next step.
Step 3 — Acknowledge data erasure and start the test
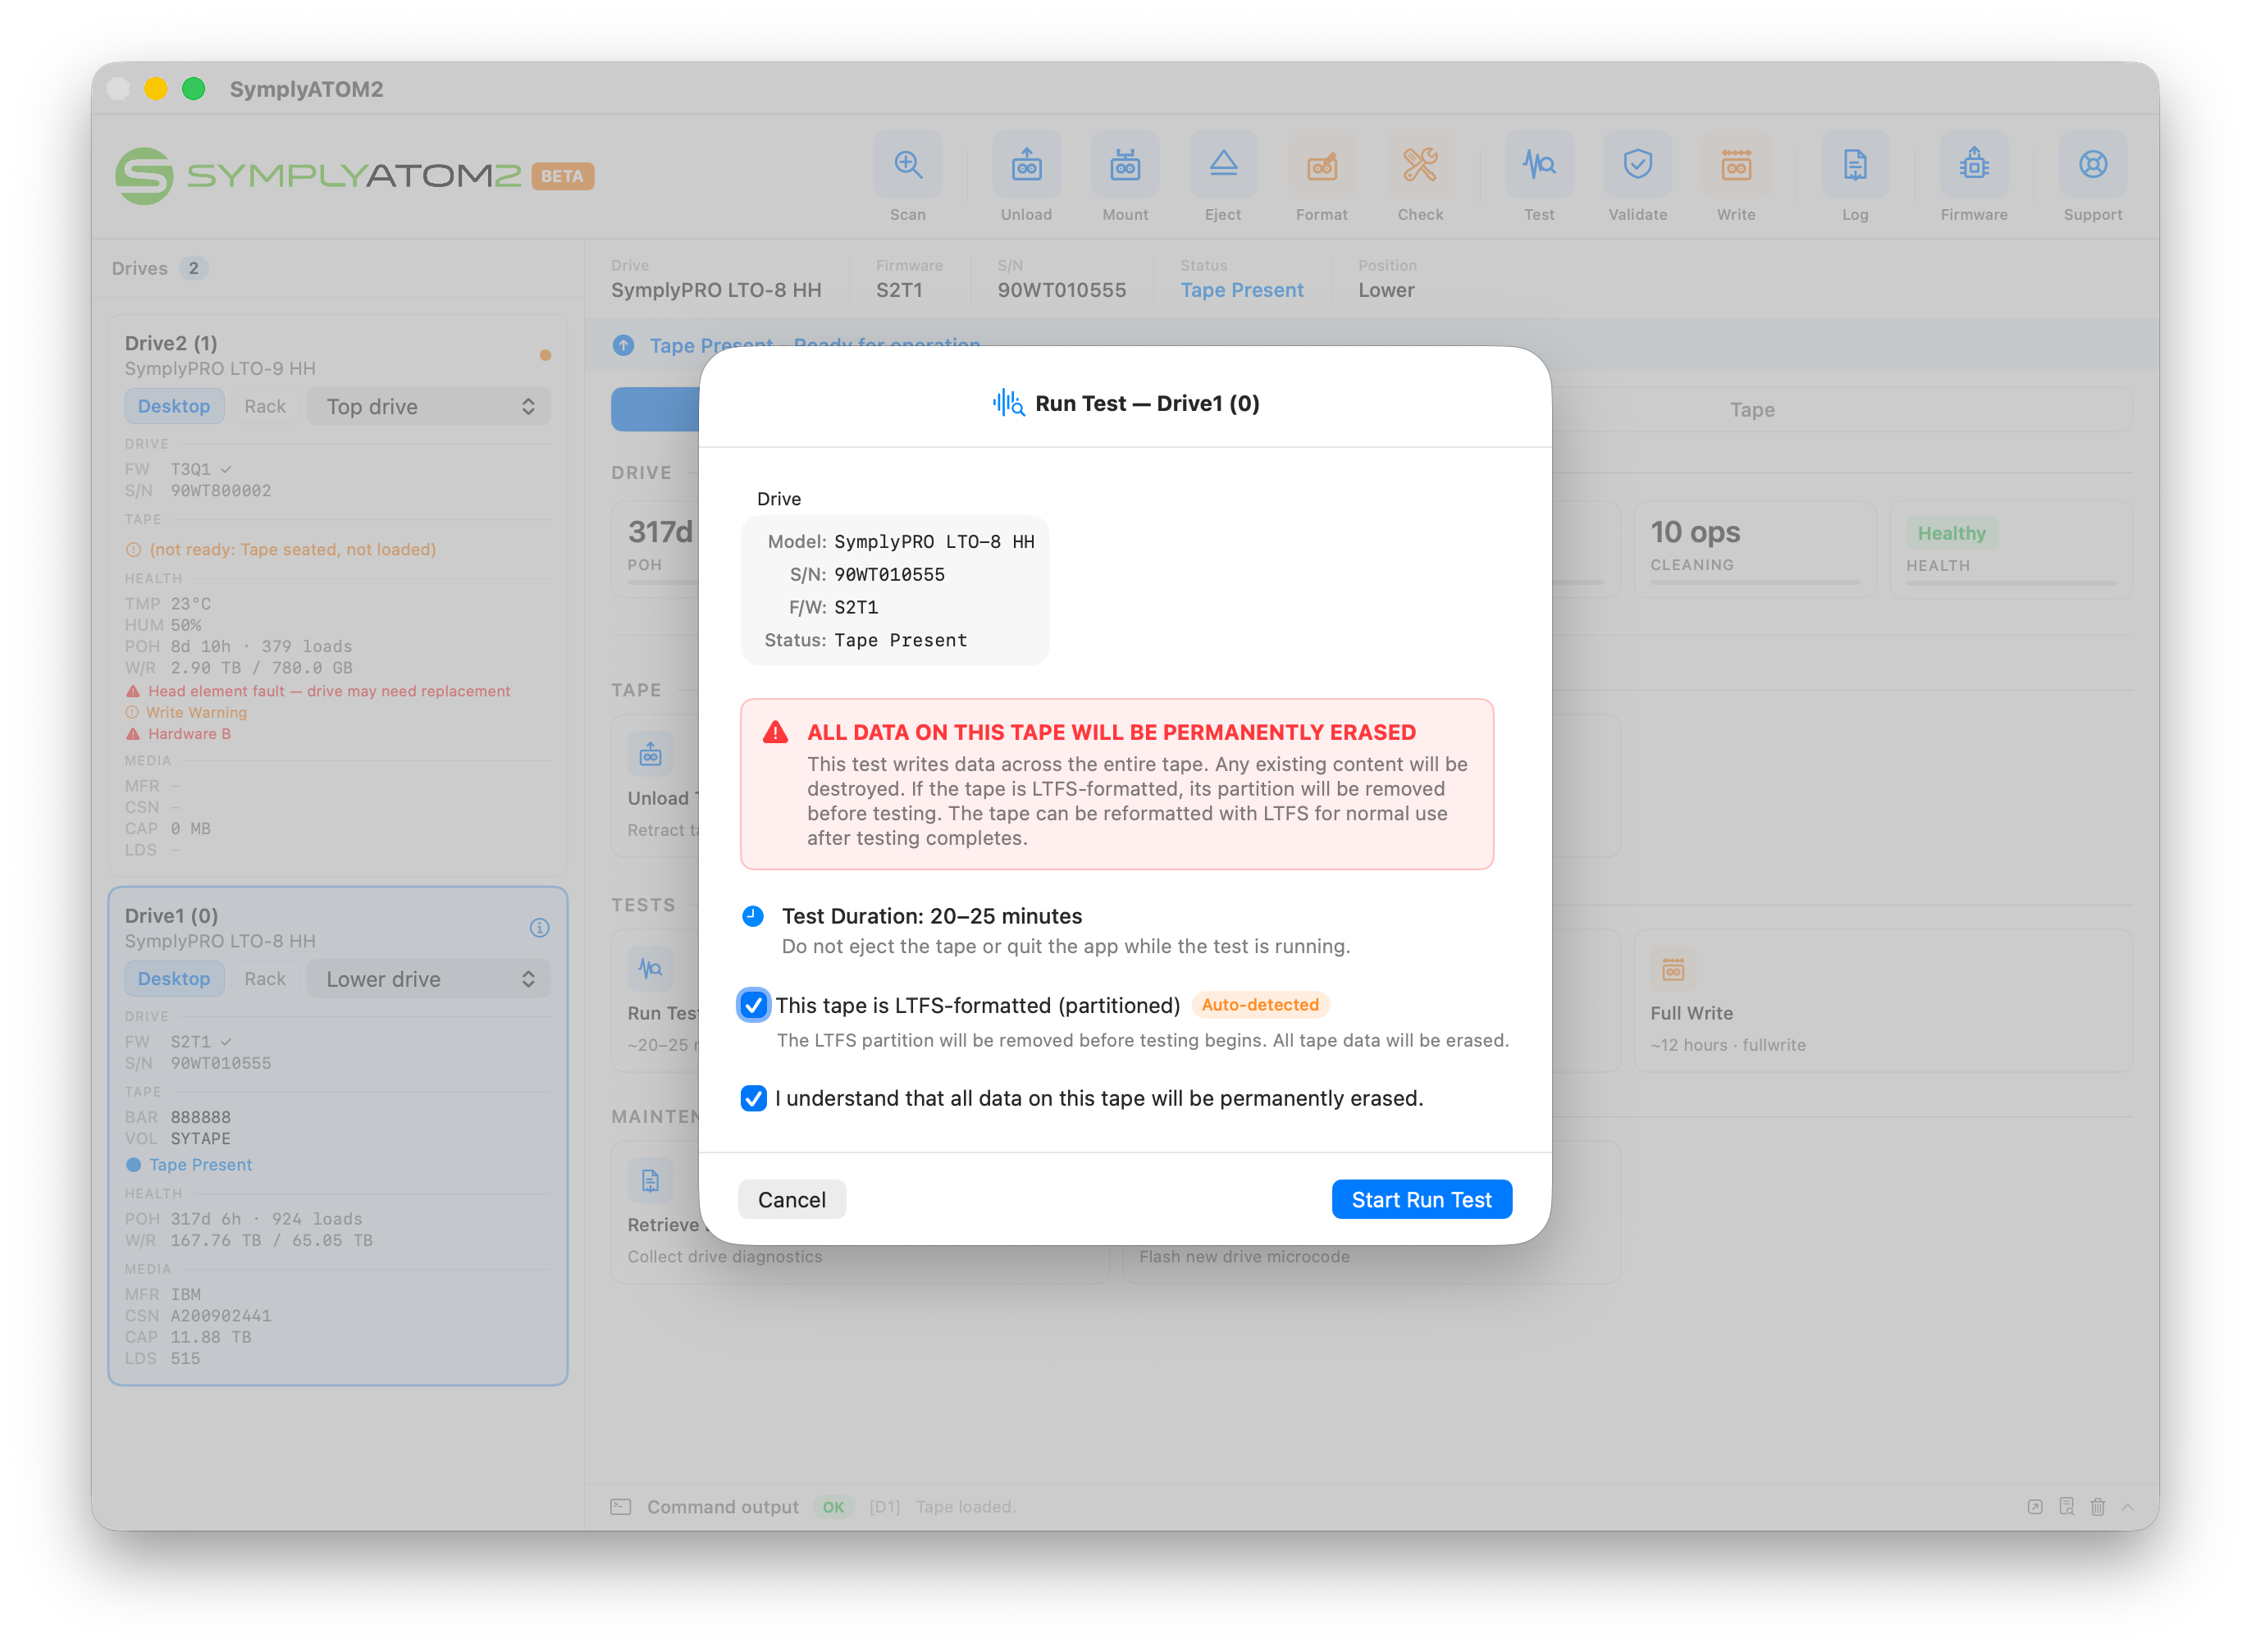
If the tape is LTFS-formatted, a second confirmation dialog will appear before the test begins:
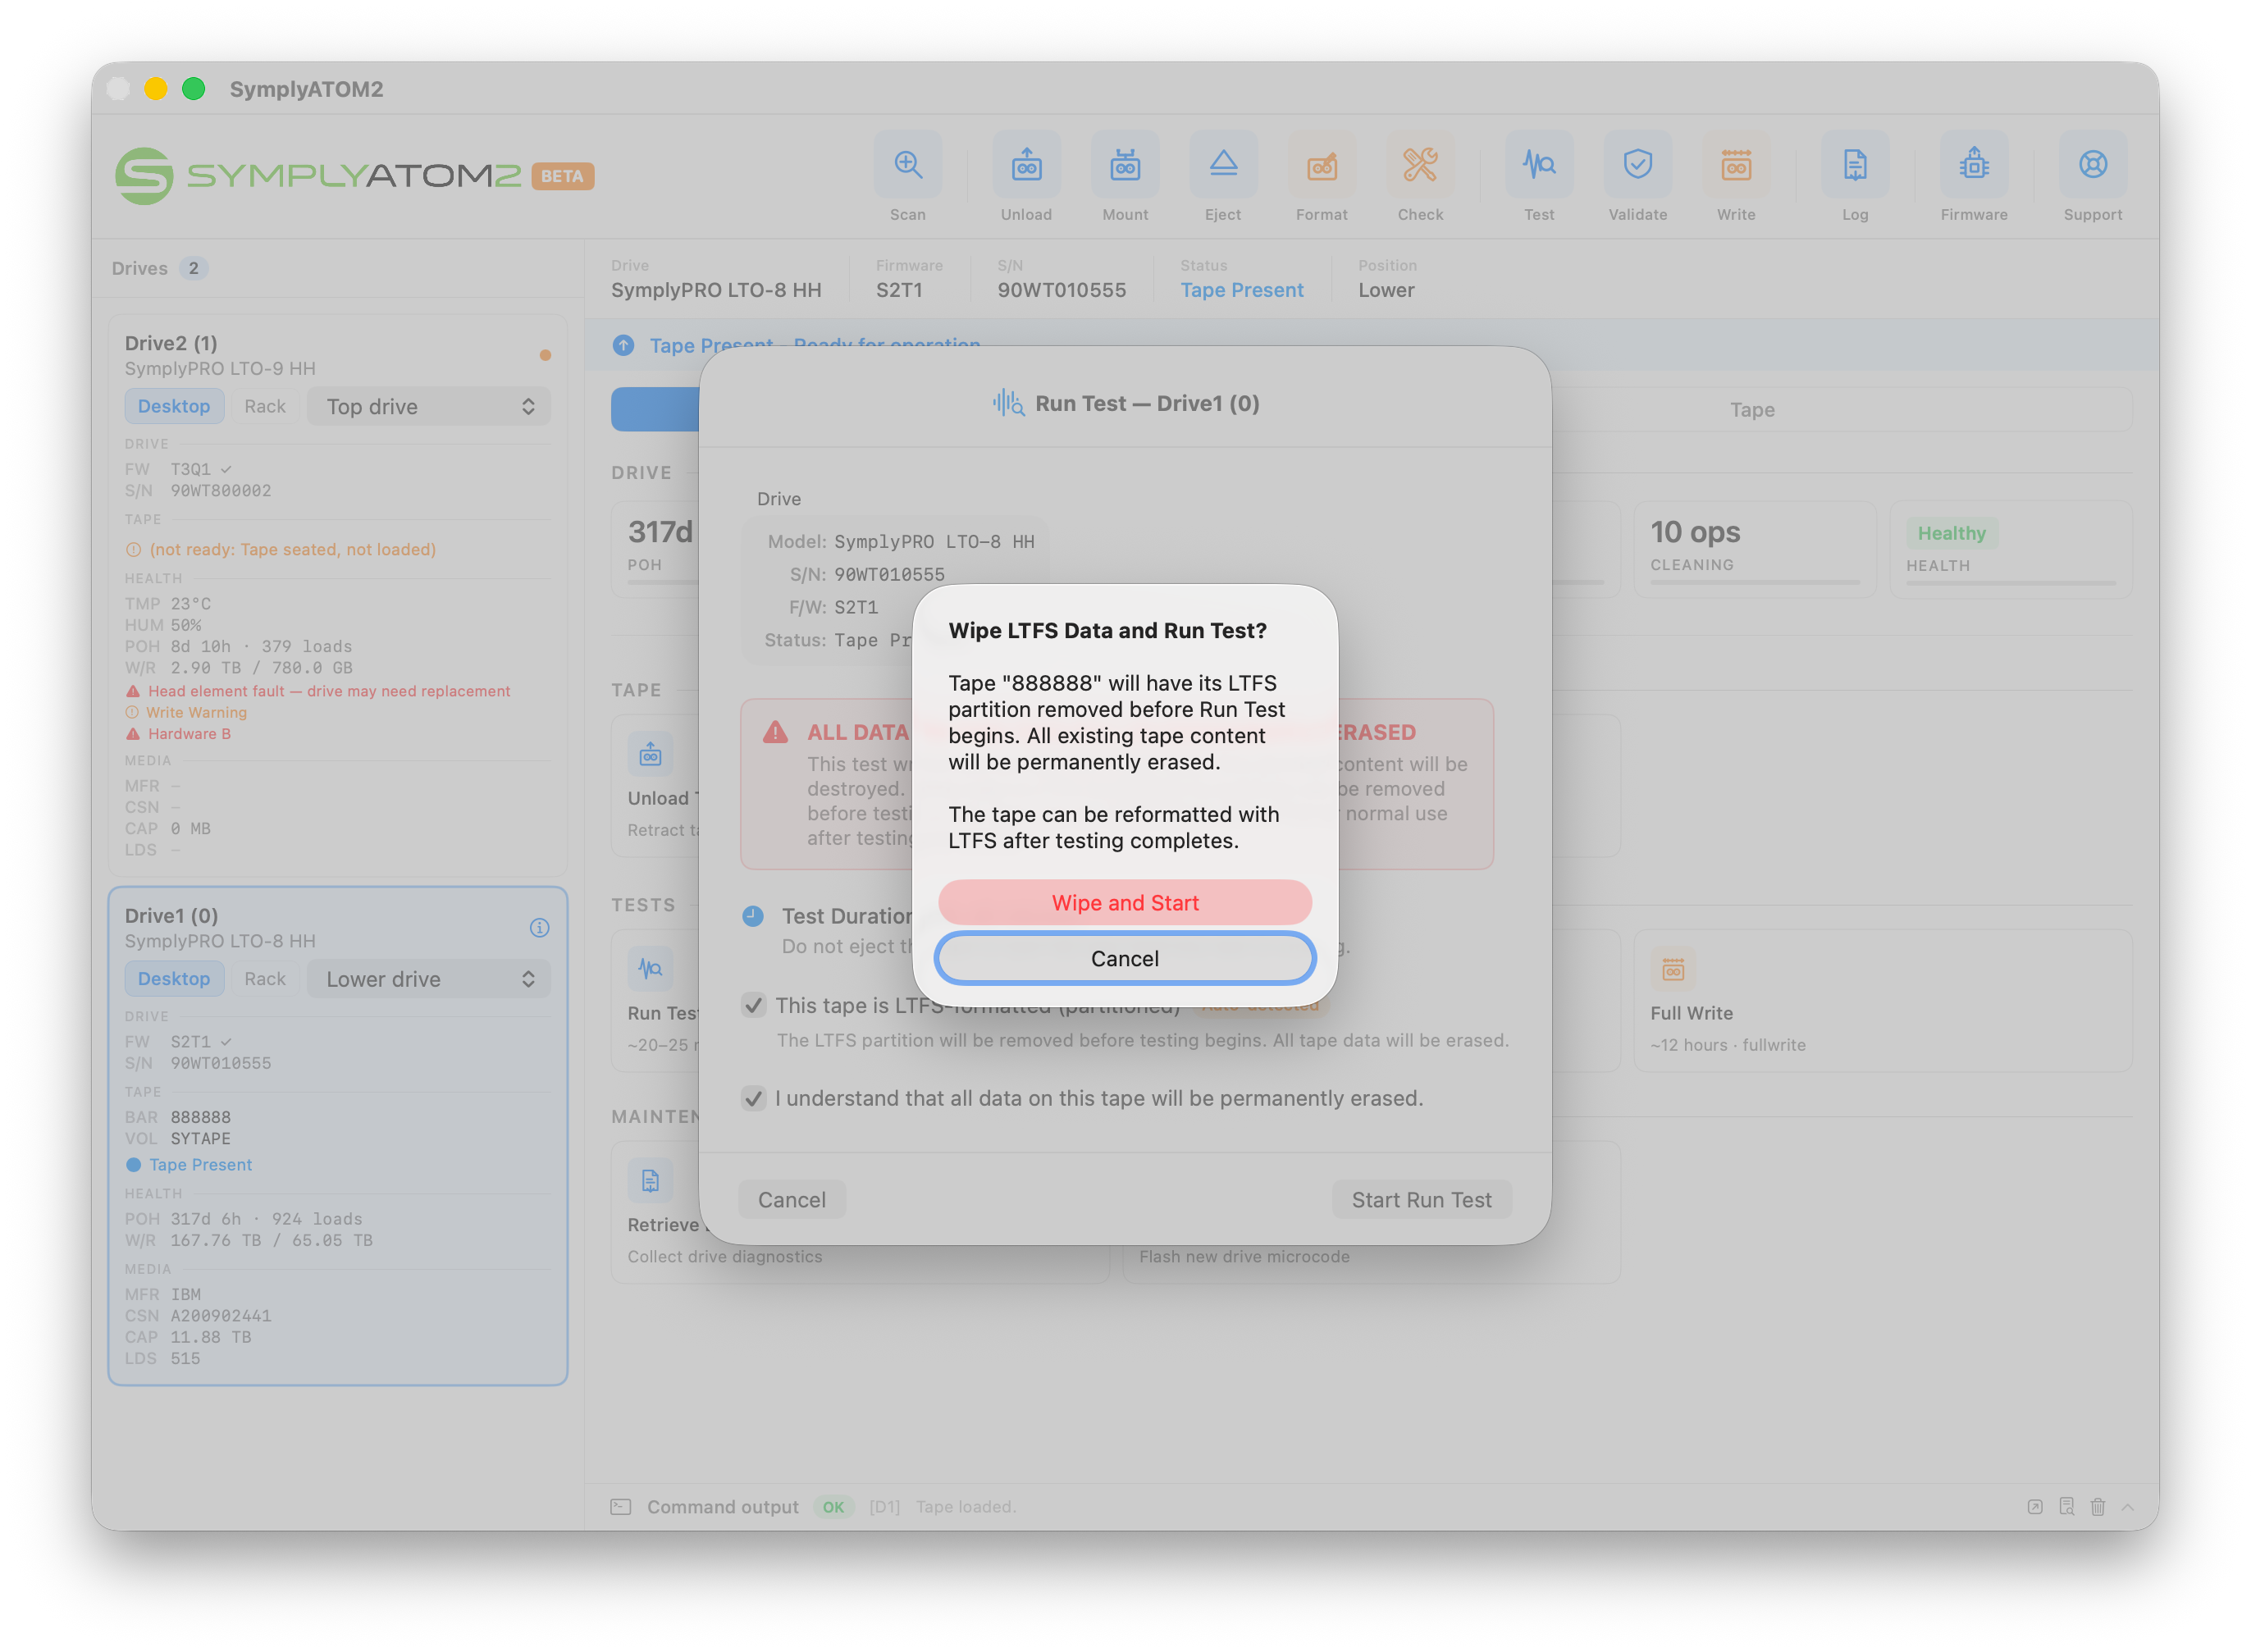
Click Wipe and Start to remove the LTFS partition and begin the test. The tape can be reformatted with LTFS after testing completes.
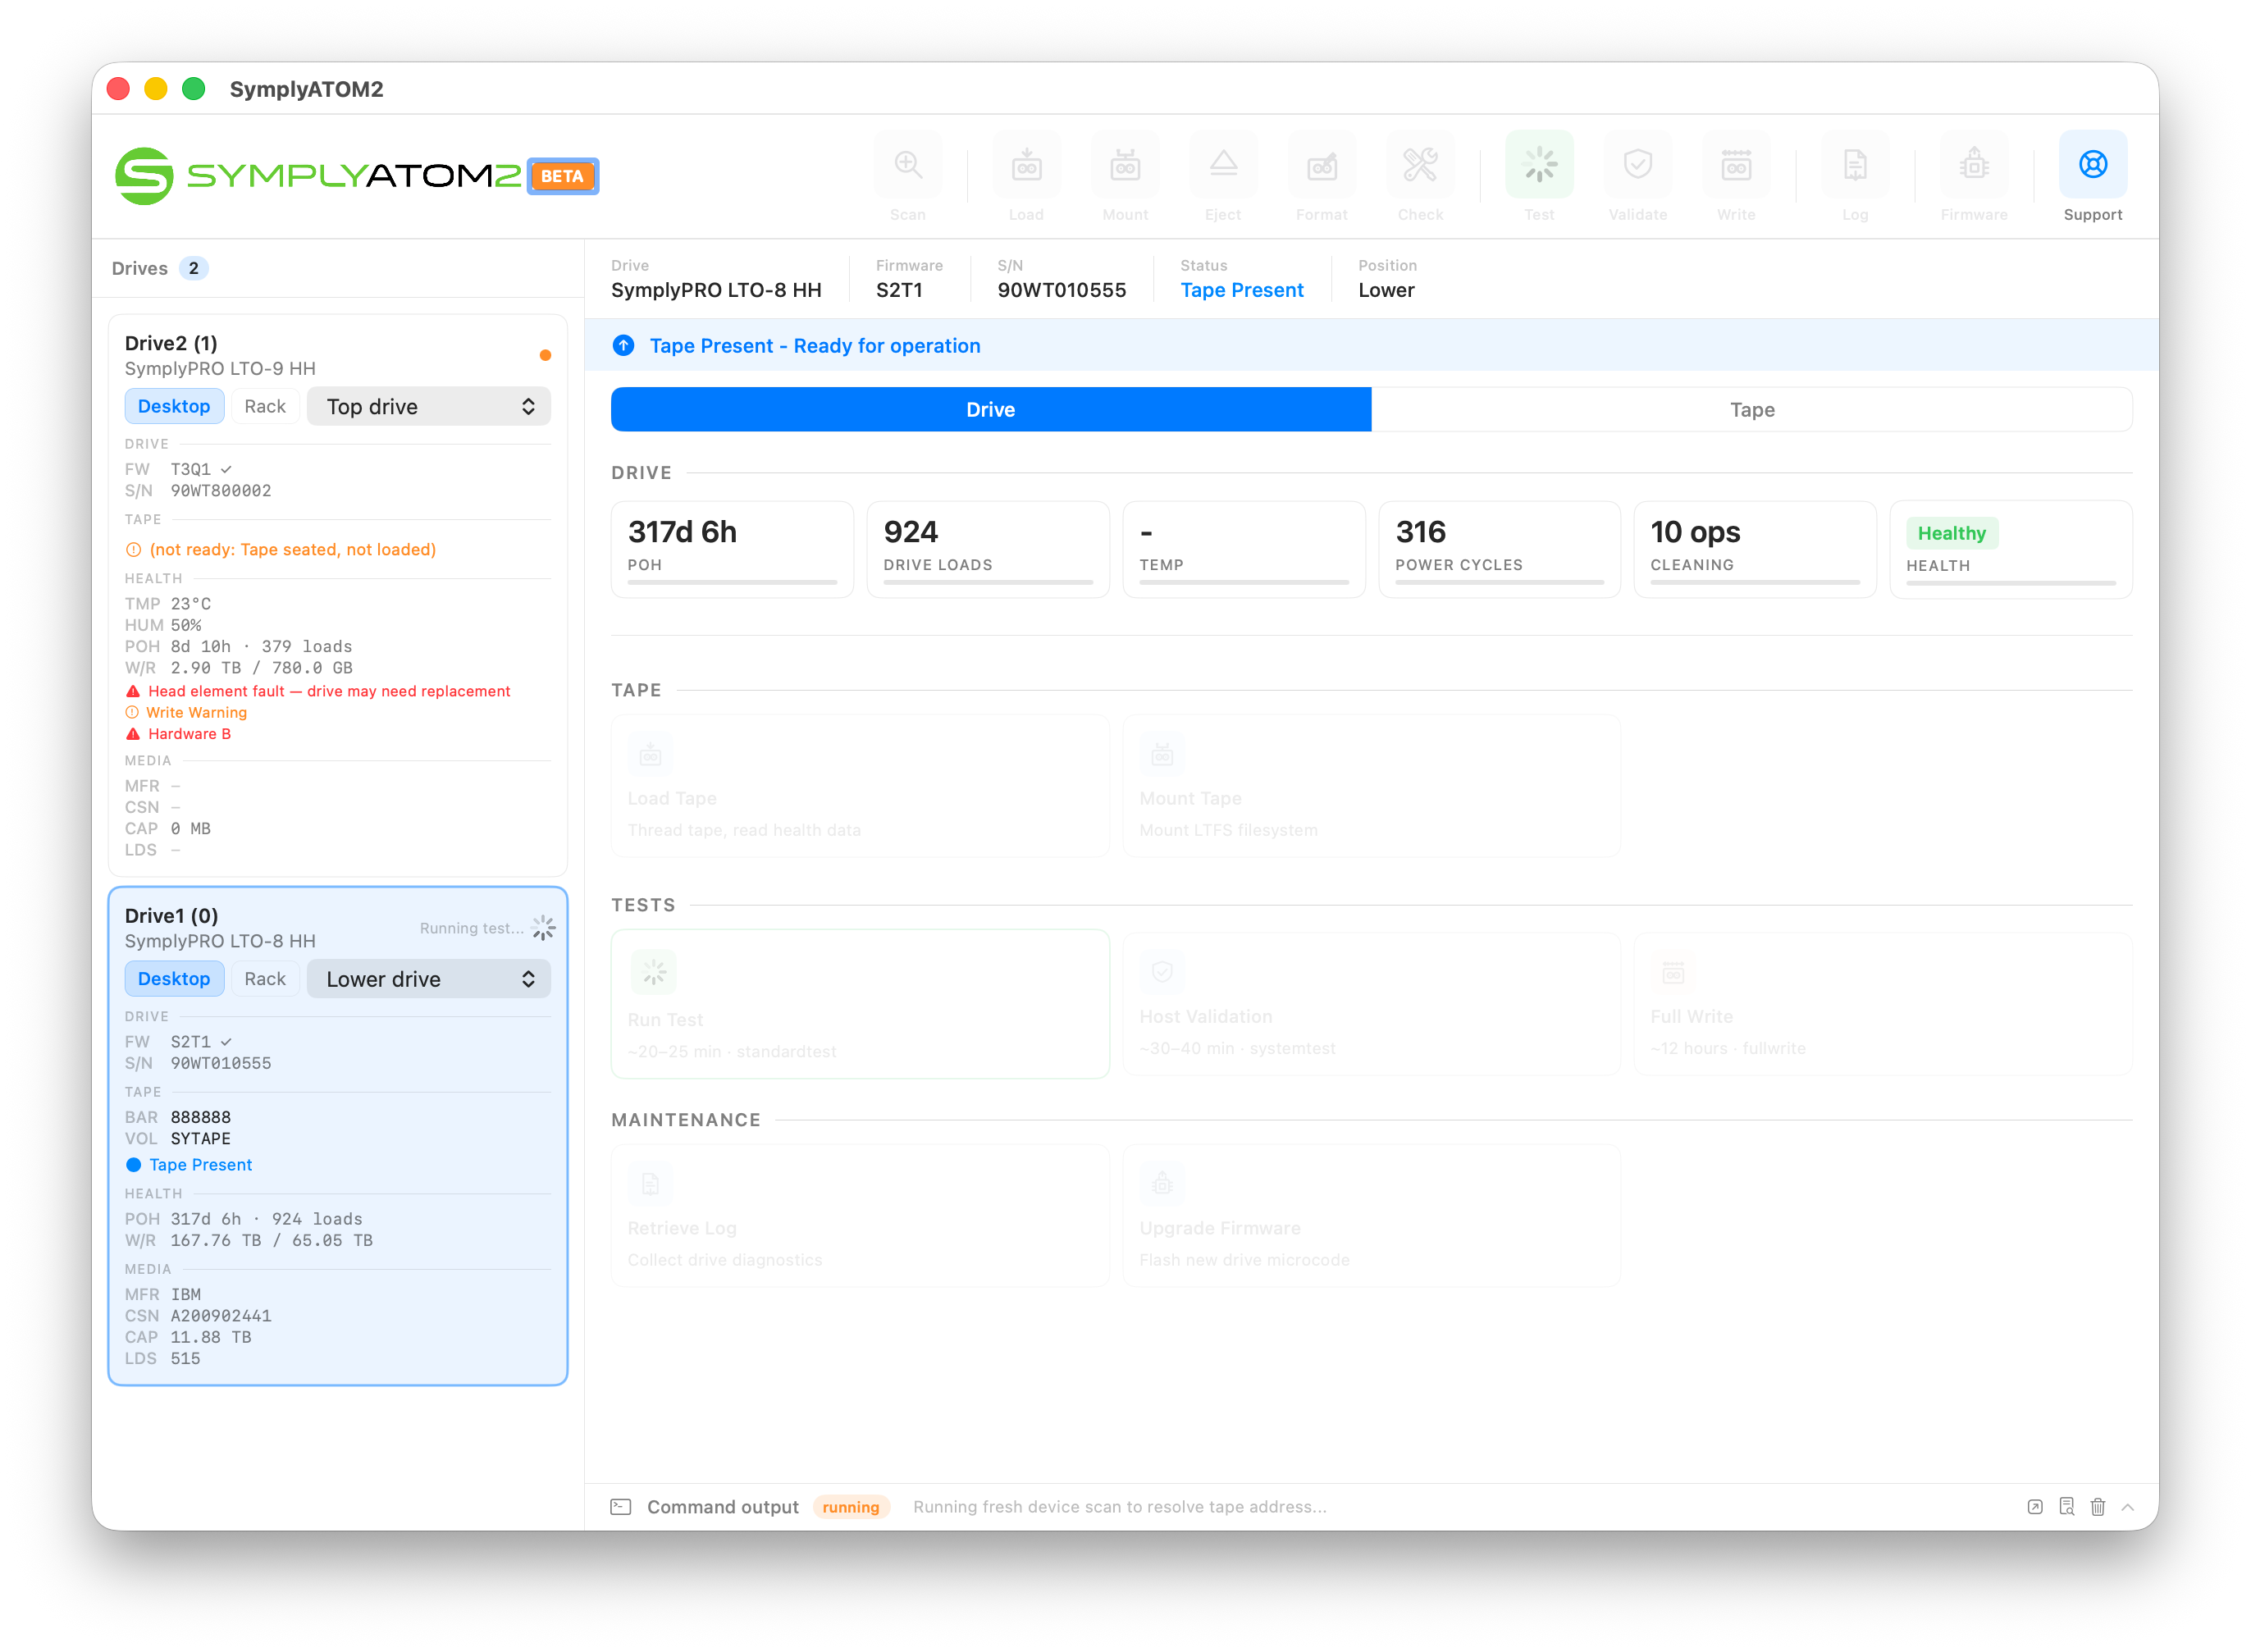
Step 4 — Wait for the test to complete
SymplyATOM2 will begin writing and reading back data across the full tape. During this time the drive entry in the sidebar will show Running test… and all other drive actions will be temporarily disabled. The status bar at the bottom of the window shows the current operation in progress.
Step 5 — Review the result
When the test finishes, a result sheet will appear showing the drive serial number and the test outcome.
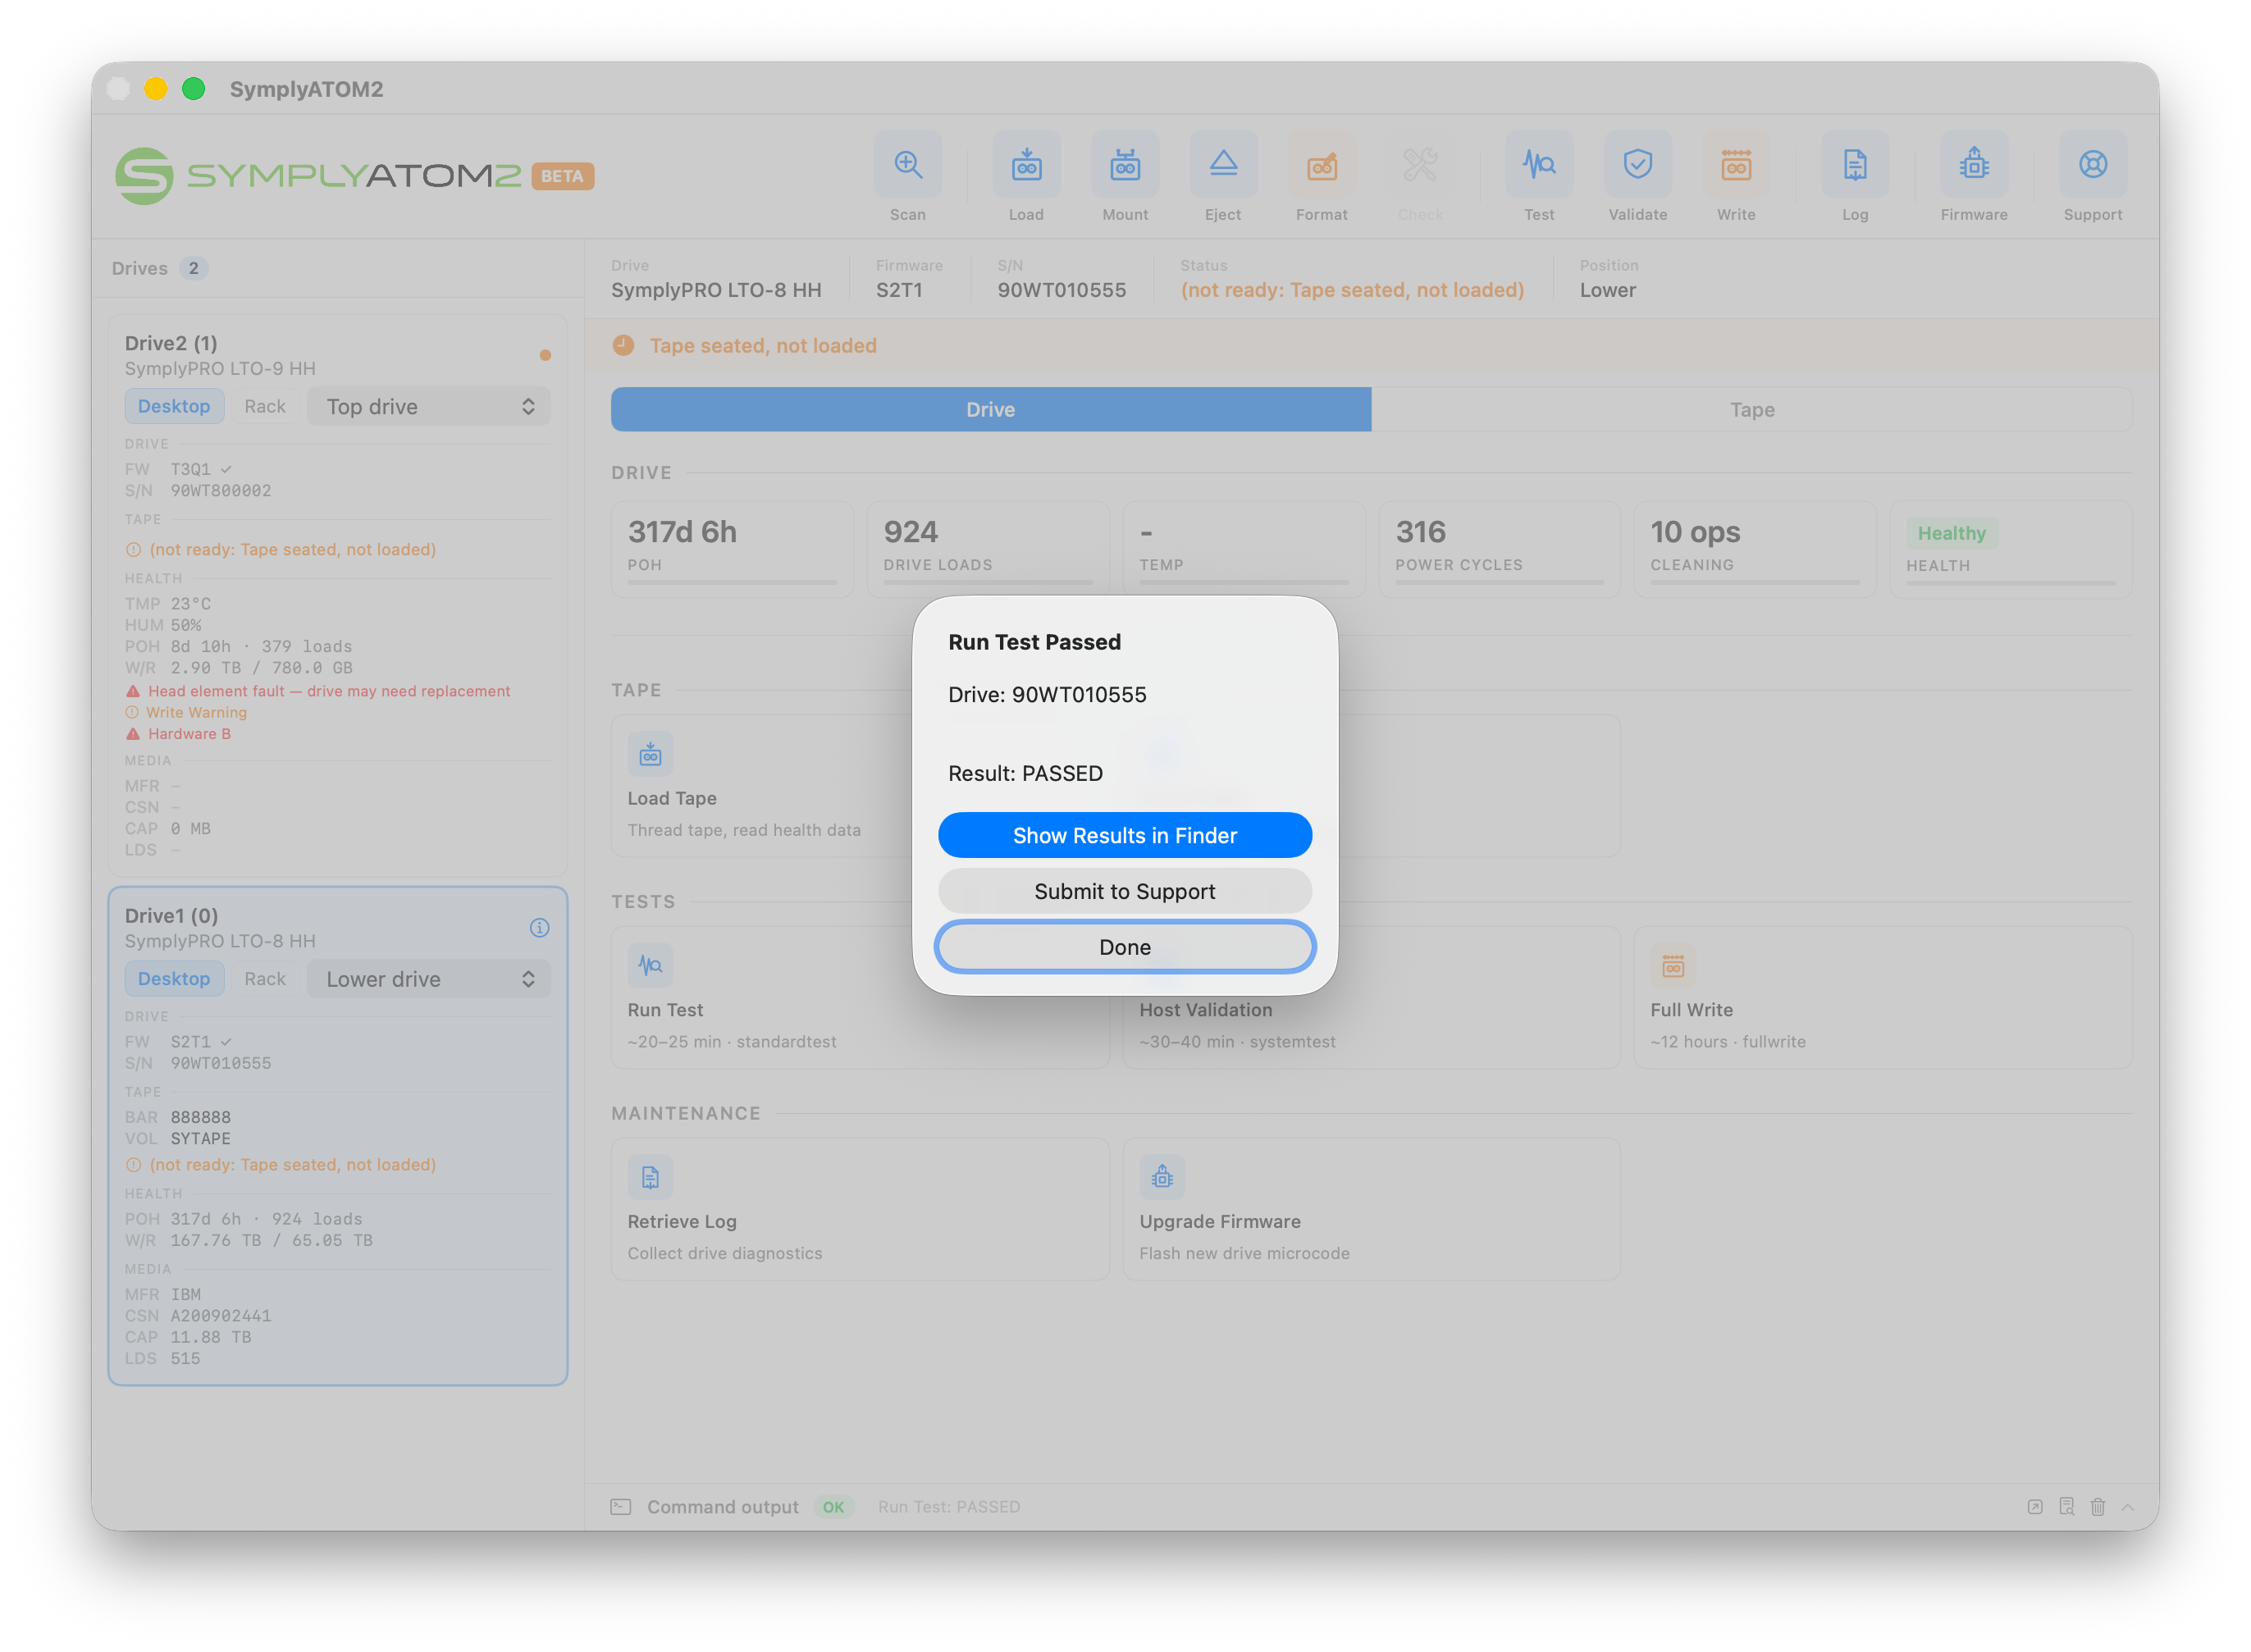
From this sheet you have three options:
- Show Results in Finder — Opens the folder containing the Run Test results file on your Mac (Windows: opens in File Explorer). Useful if you want to attach the file manually to an email or ticket.
- Submit to Support — Opens the Submit Support Request window to upload the results and create or update a Symply support ticket. This is the recommended option.
- Done — Closes the sheet without submitting. You can submit later using the Support toolbar button.
Step 6 — Submit to Support
Clicking Submit to Support opens the Submit Support Request window. This builds a compressed diagnostic bundle, uploads it securely to SymplyNEBULA, and either creates a new support ticket or adds a note to an existing one.
What's included in the bundle
| Item | Included | Notes |
|---|---|---|
| Full System Information report (.spx) | Always | macOS system profile — hardware, OS, connected devices |
| Network state snapshots | Always | Sysdiagnose-style triage data |
| Support context & manifest files | Always | App version, drive details, current drive state |
| Current SymplyATOM2 session log | Selected by default | Application log from the current session |
| Latest Run Test output | Selected by default | The results file from the test completed in Steps 1–5. Shows how recently it was captured. |
| Retrieve Log, Host Validation, Full Write | Optional | Only available if those operations have been run. Greyed out otherwise — run the relevant operation first to include. |
| Firmware Upgrade output | Optional | Only included if a firmware upgrade was performed within the last 24 hours. |
| Crash reports | Optional | Include if SymplyATOM2 has crashed or behaved unexpectedly. |
An estimated bundle size is shown before you submit, so you know what will be uploaded.
Option A — Create a new support ticket
Select Create new ticket if you have not already contacted Symply Support about this issue.
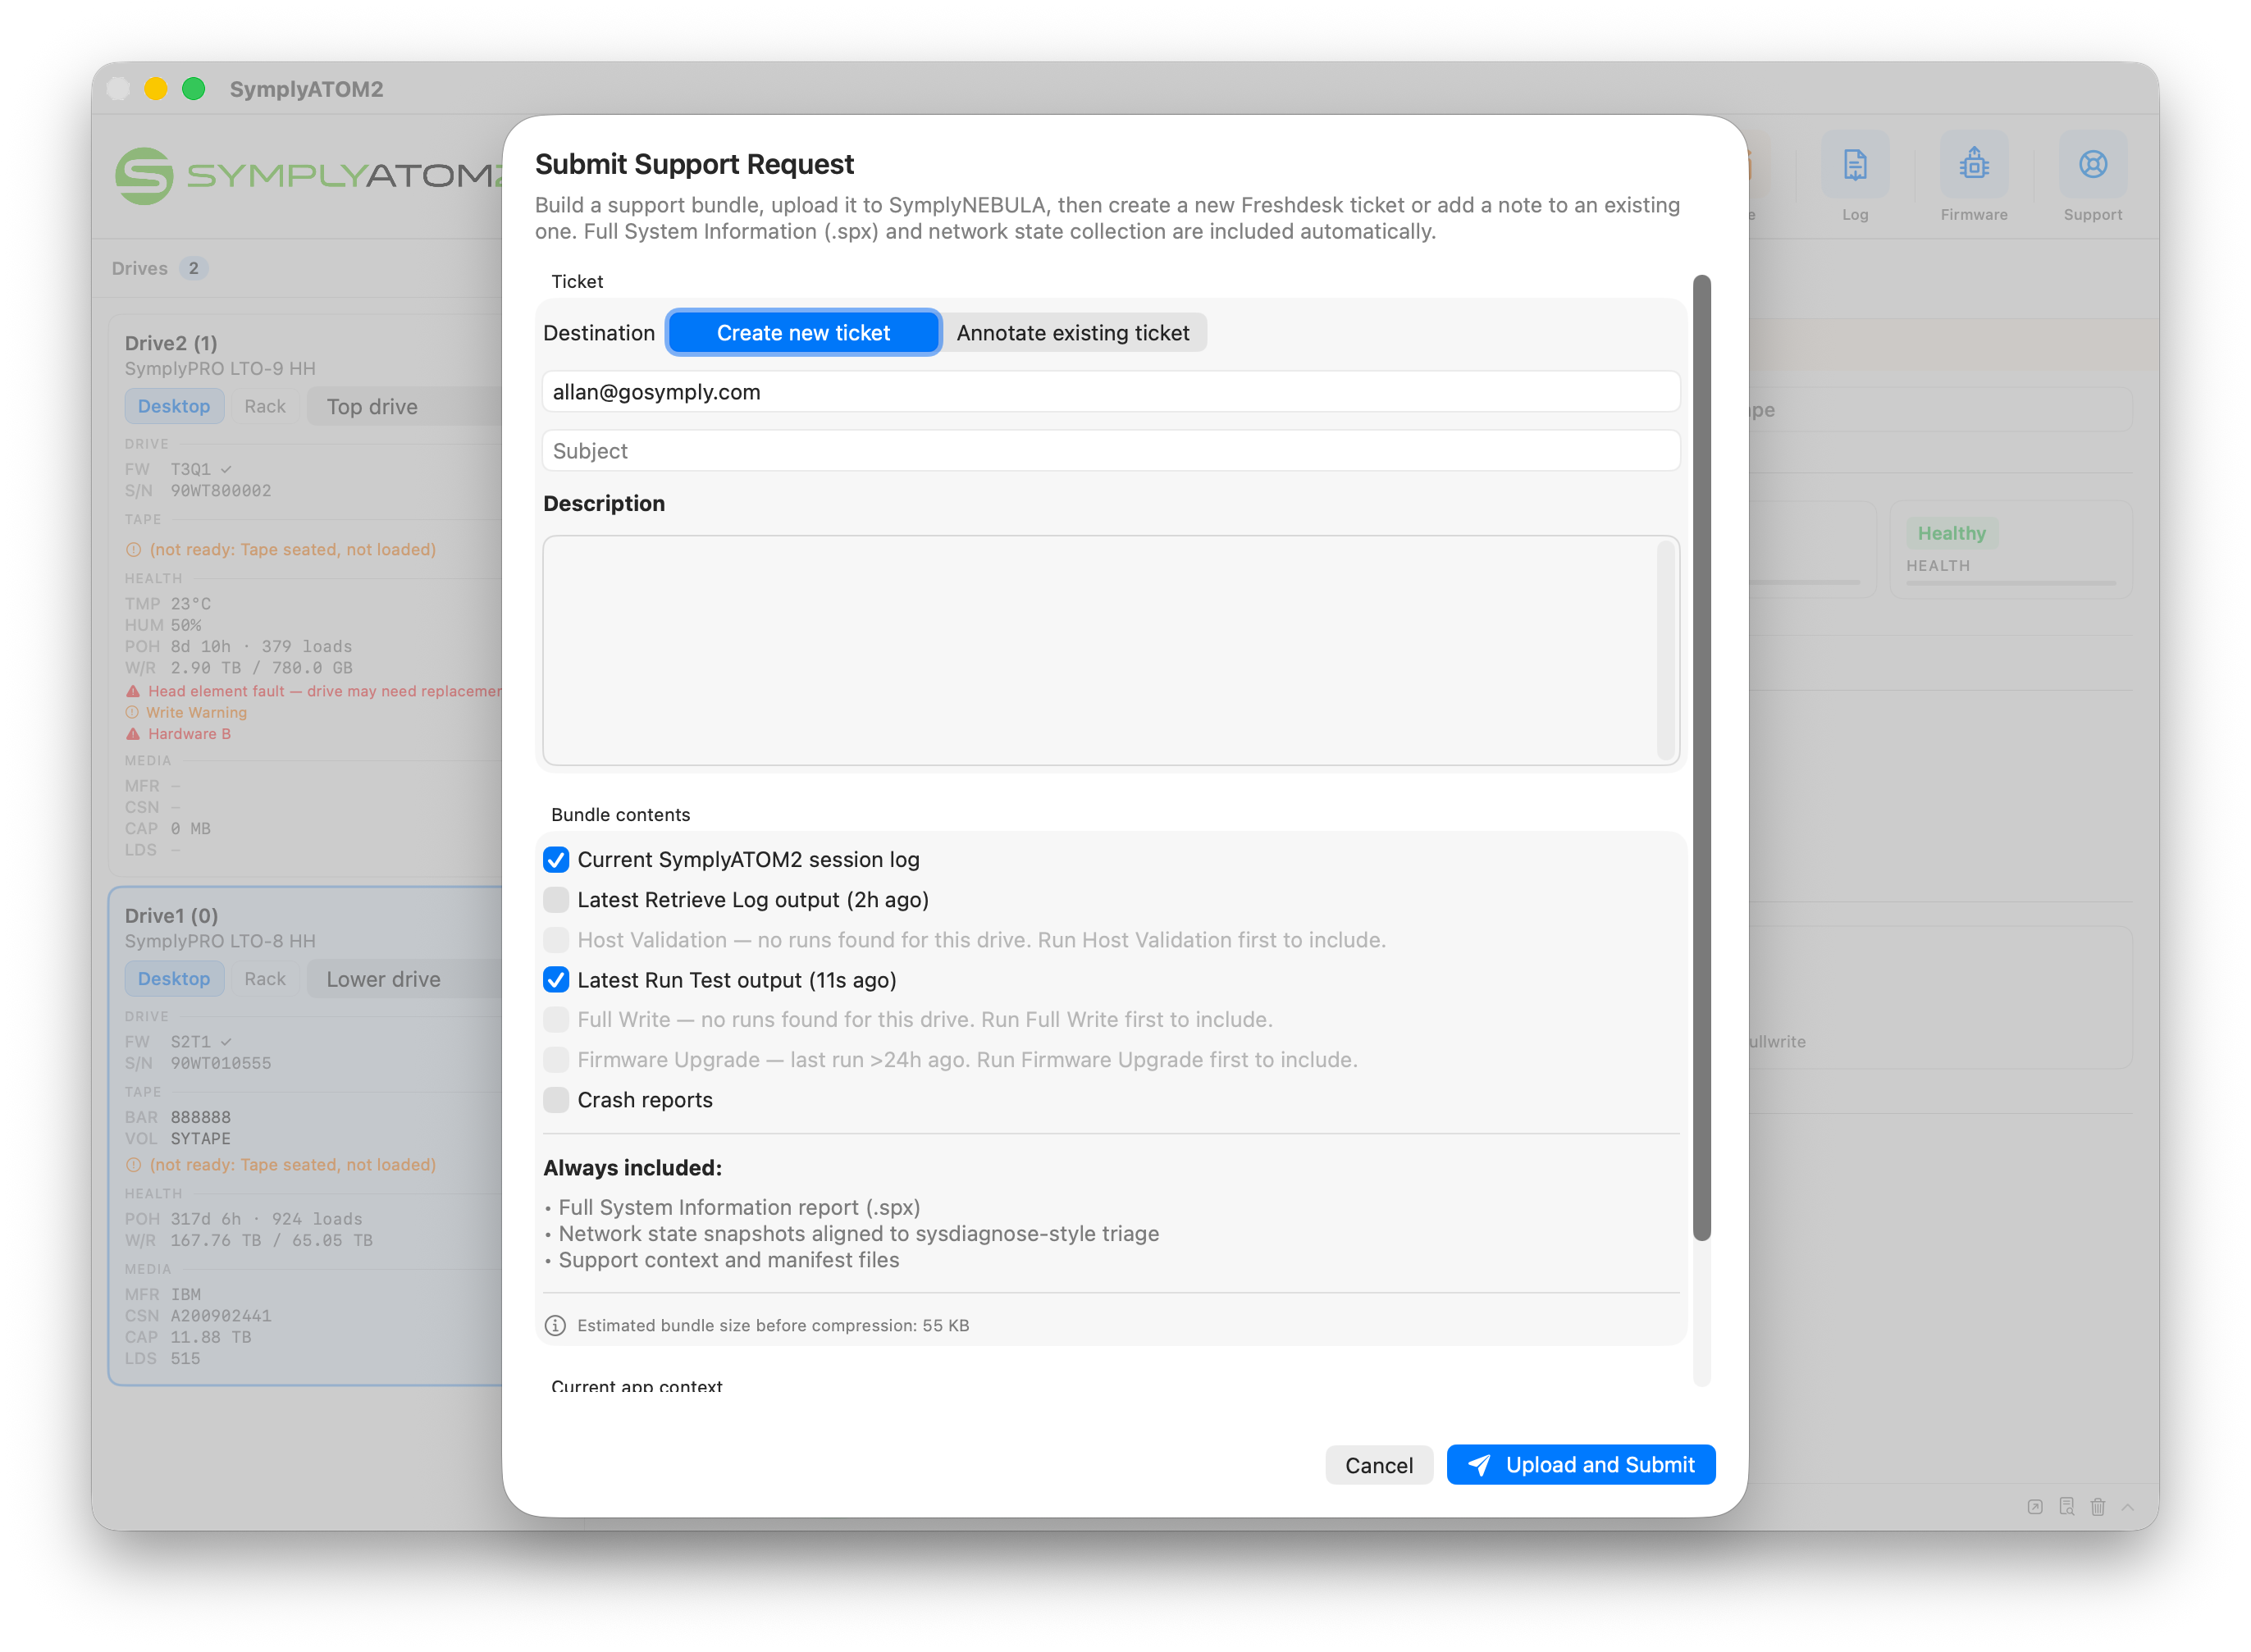
- Confirm or enter the email address associated with your Symply account.
- Enter a short Subject summarising the reason for the test (e.g. LTO-8 drive — Run Test results as requested).
- In the Description field, describe what you observed before running the test and any symptoms that prompted the support request.
- Review the Bundle contents checklist and tick any additional items you want to include.
- Click Upload and Submit.
Option B — Add diagnostics to an existing ticket
Select Annotate existing ticket if Symply Support has already opened a case and asked you to run a test and submit the results.
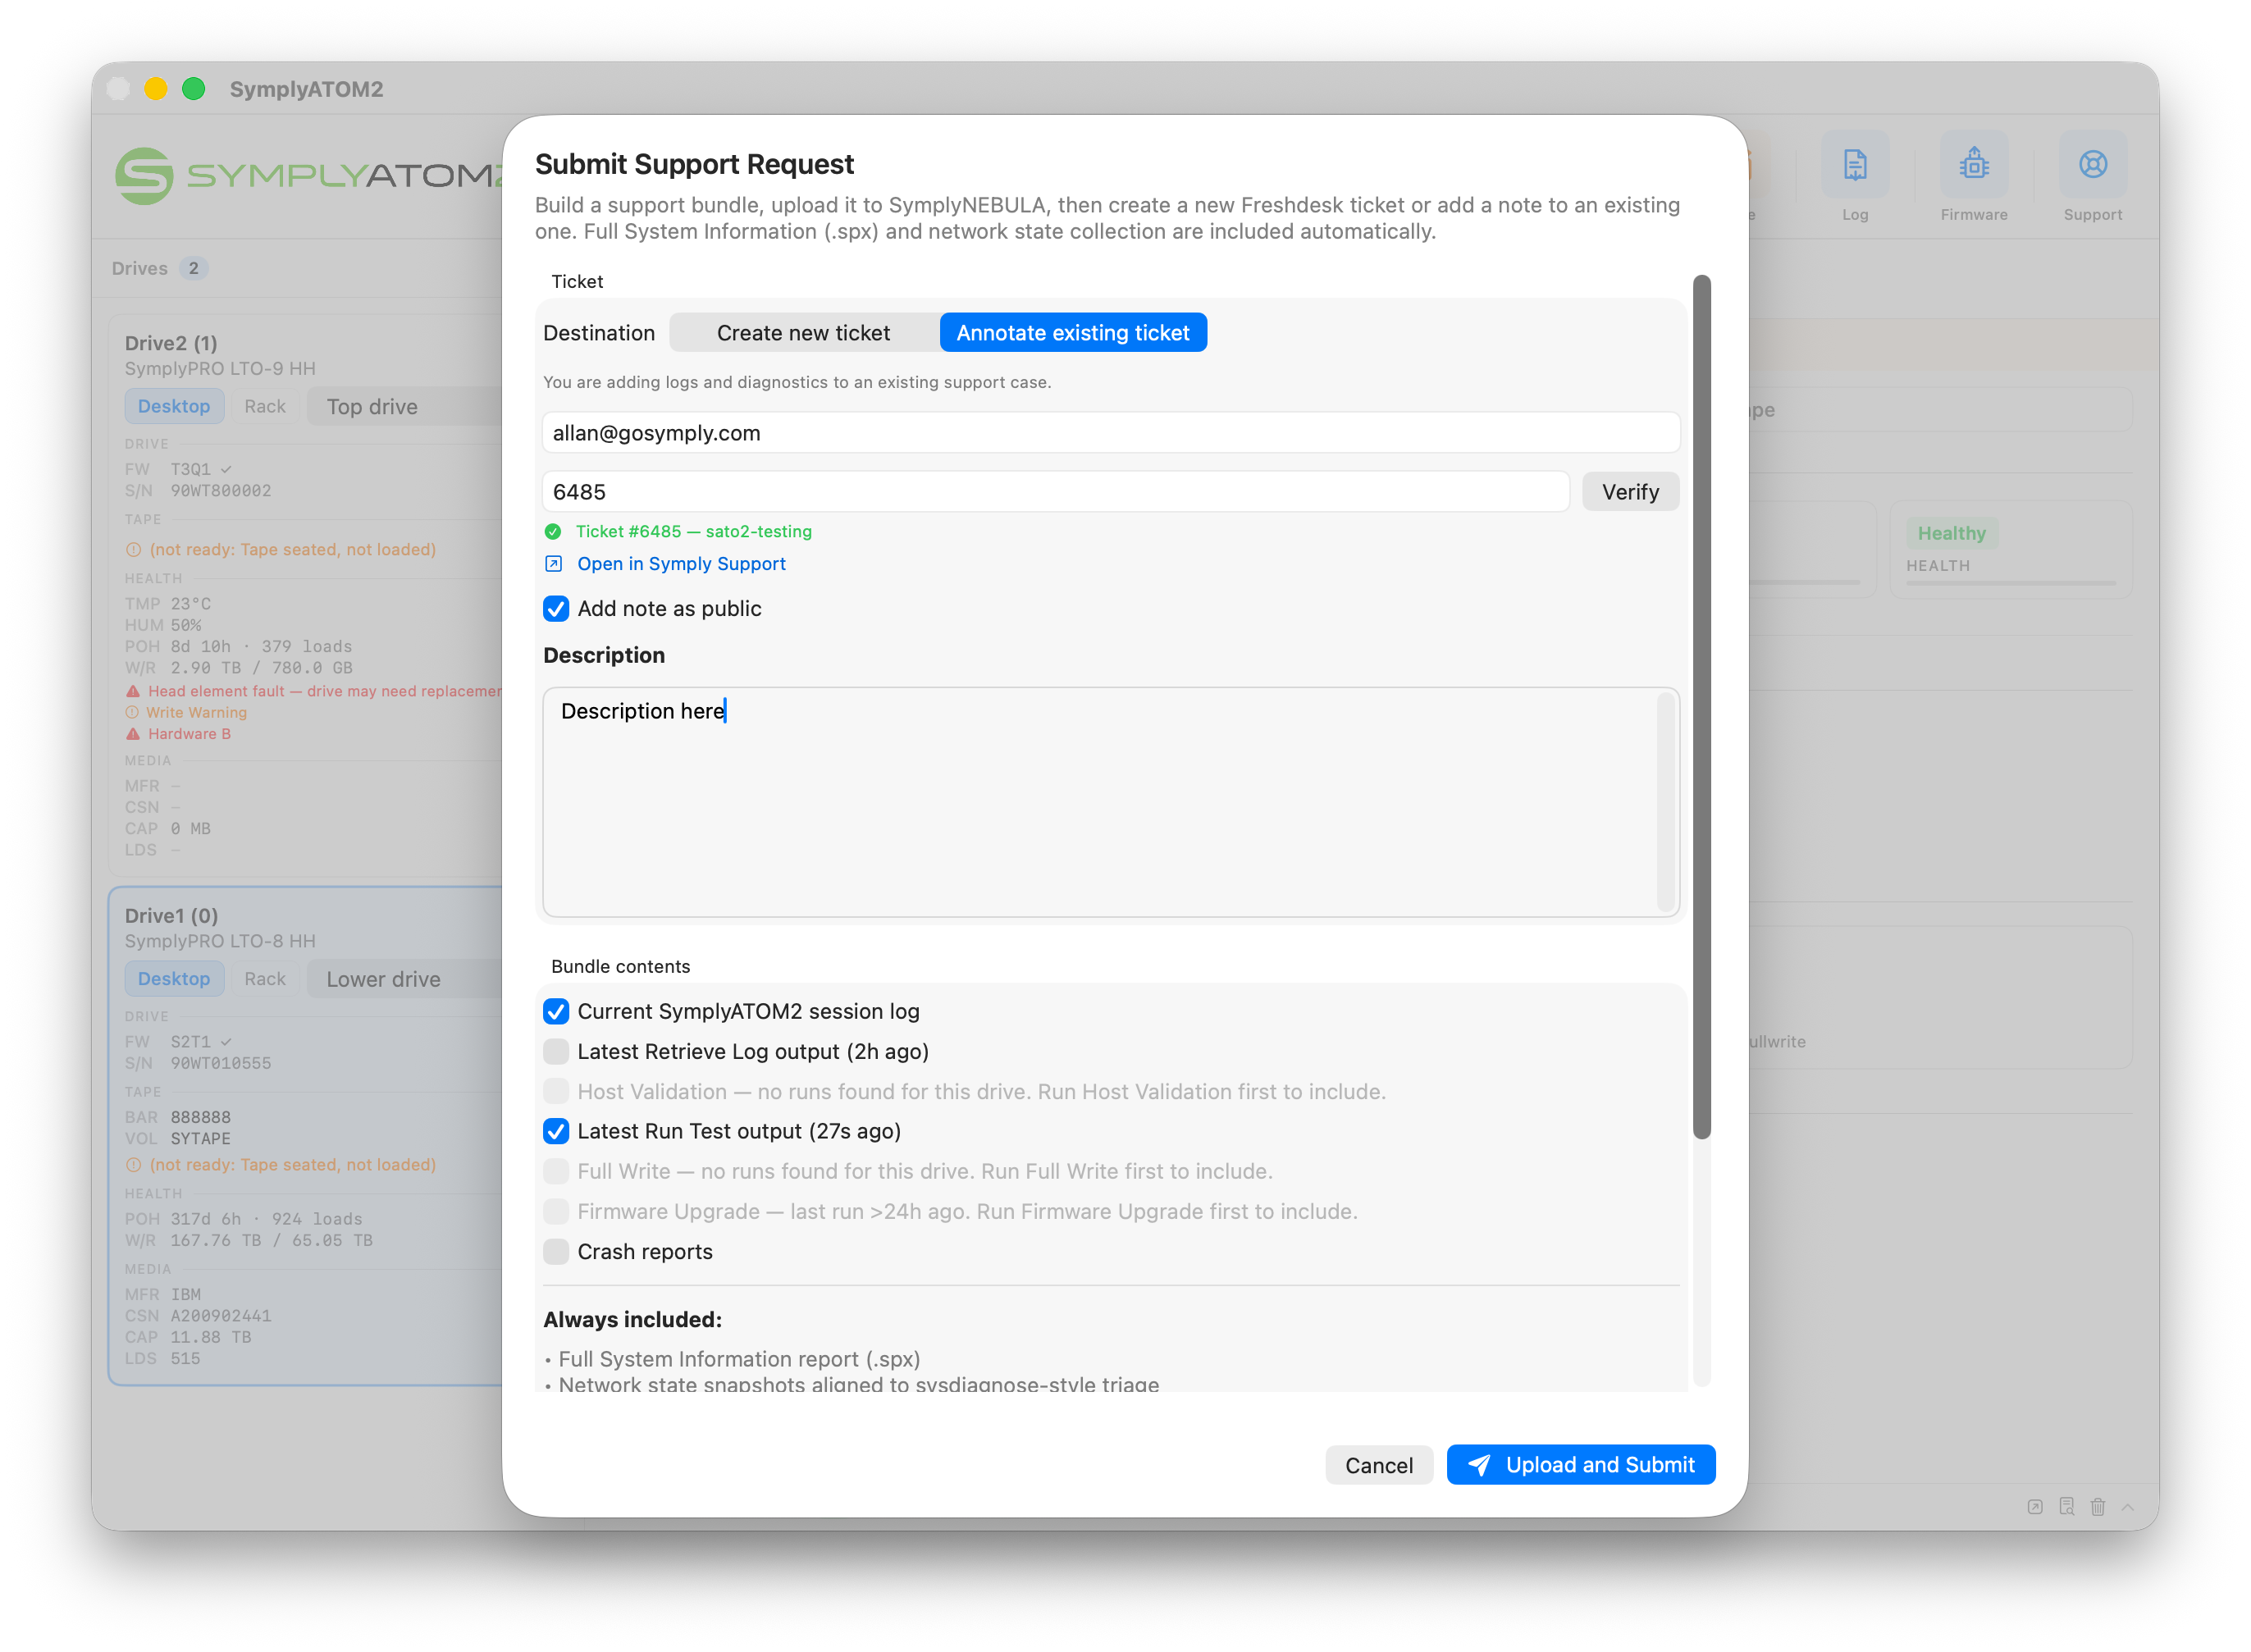
- Enter the email address used when the original ticket was raised.
- Enter the Ticket ID number from your existing support case (found in the subject line of any Symply Support email, e.g. #6485).
- Click Verify. SymplyATOM2 will confirm the ticket exists and belongs to your email address.
- Once verified, add a Description noting that you are submitting the Run Test results as requested.
- Review the Bundle contents and click Upload and Submit.
Step 7 — Submission confirmed
After clicking Upload and Submit, SymplyATOM2 compresses the bundle, uploads it securely to SymplyNEBULA, and attaches it to your ticket. When complete, a green confirmation message shows the ticket number.
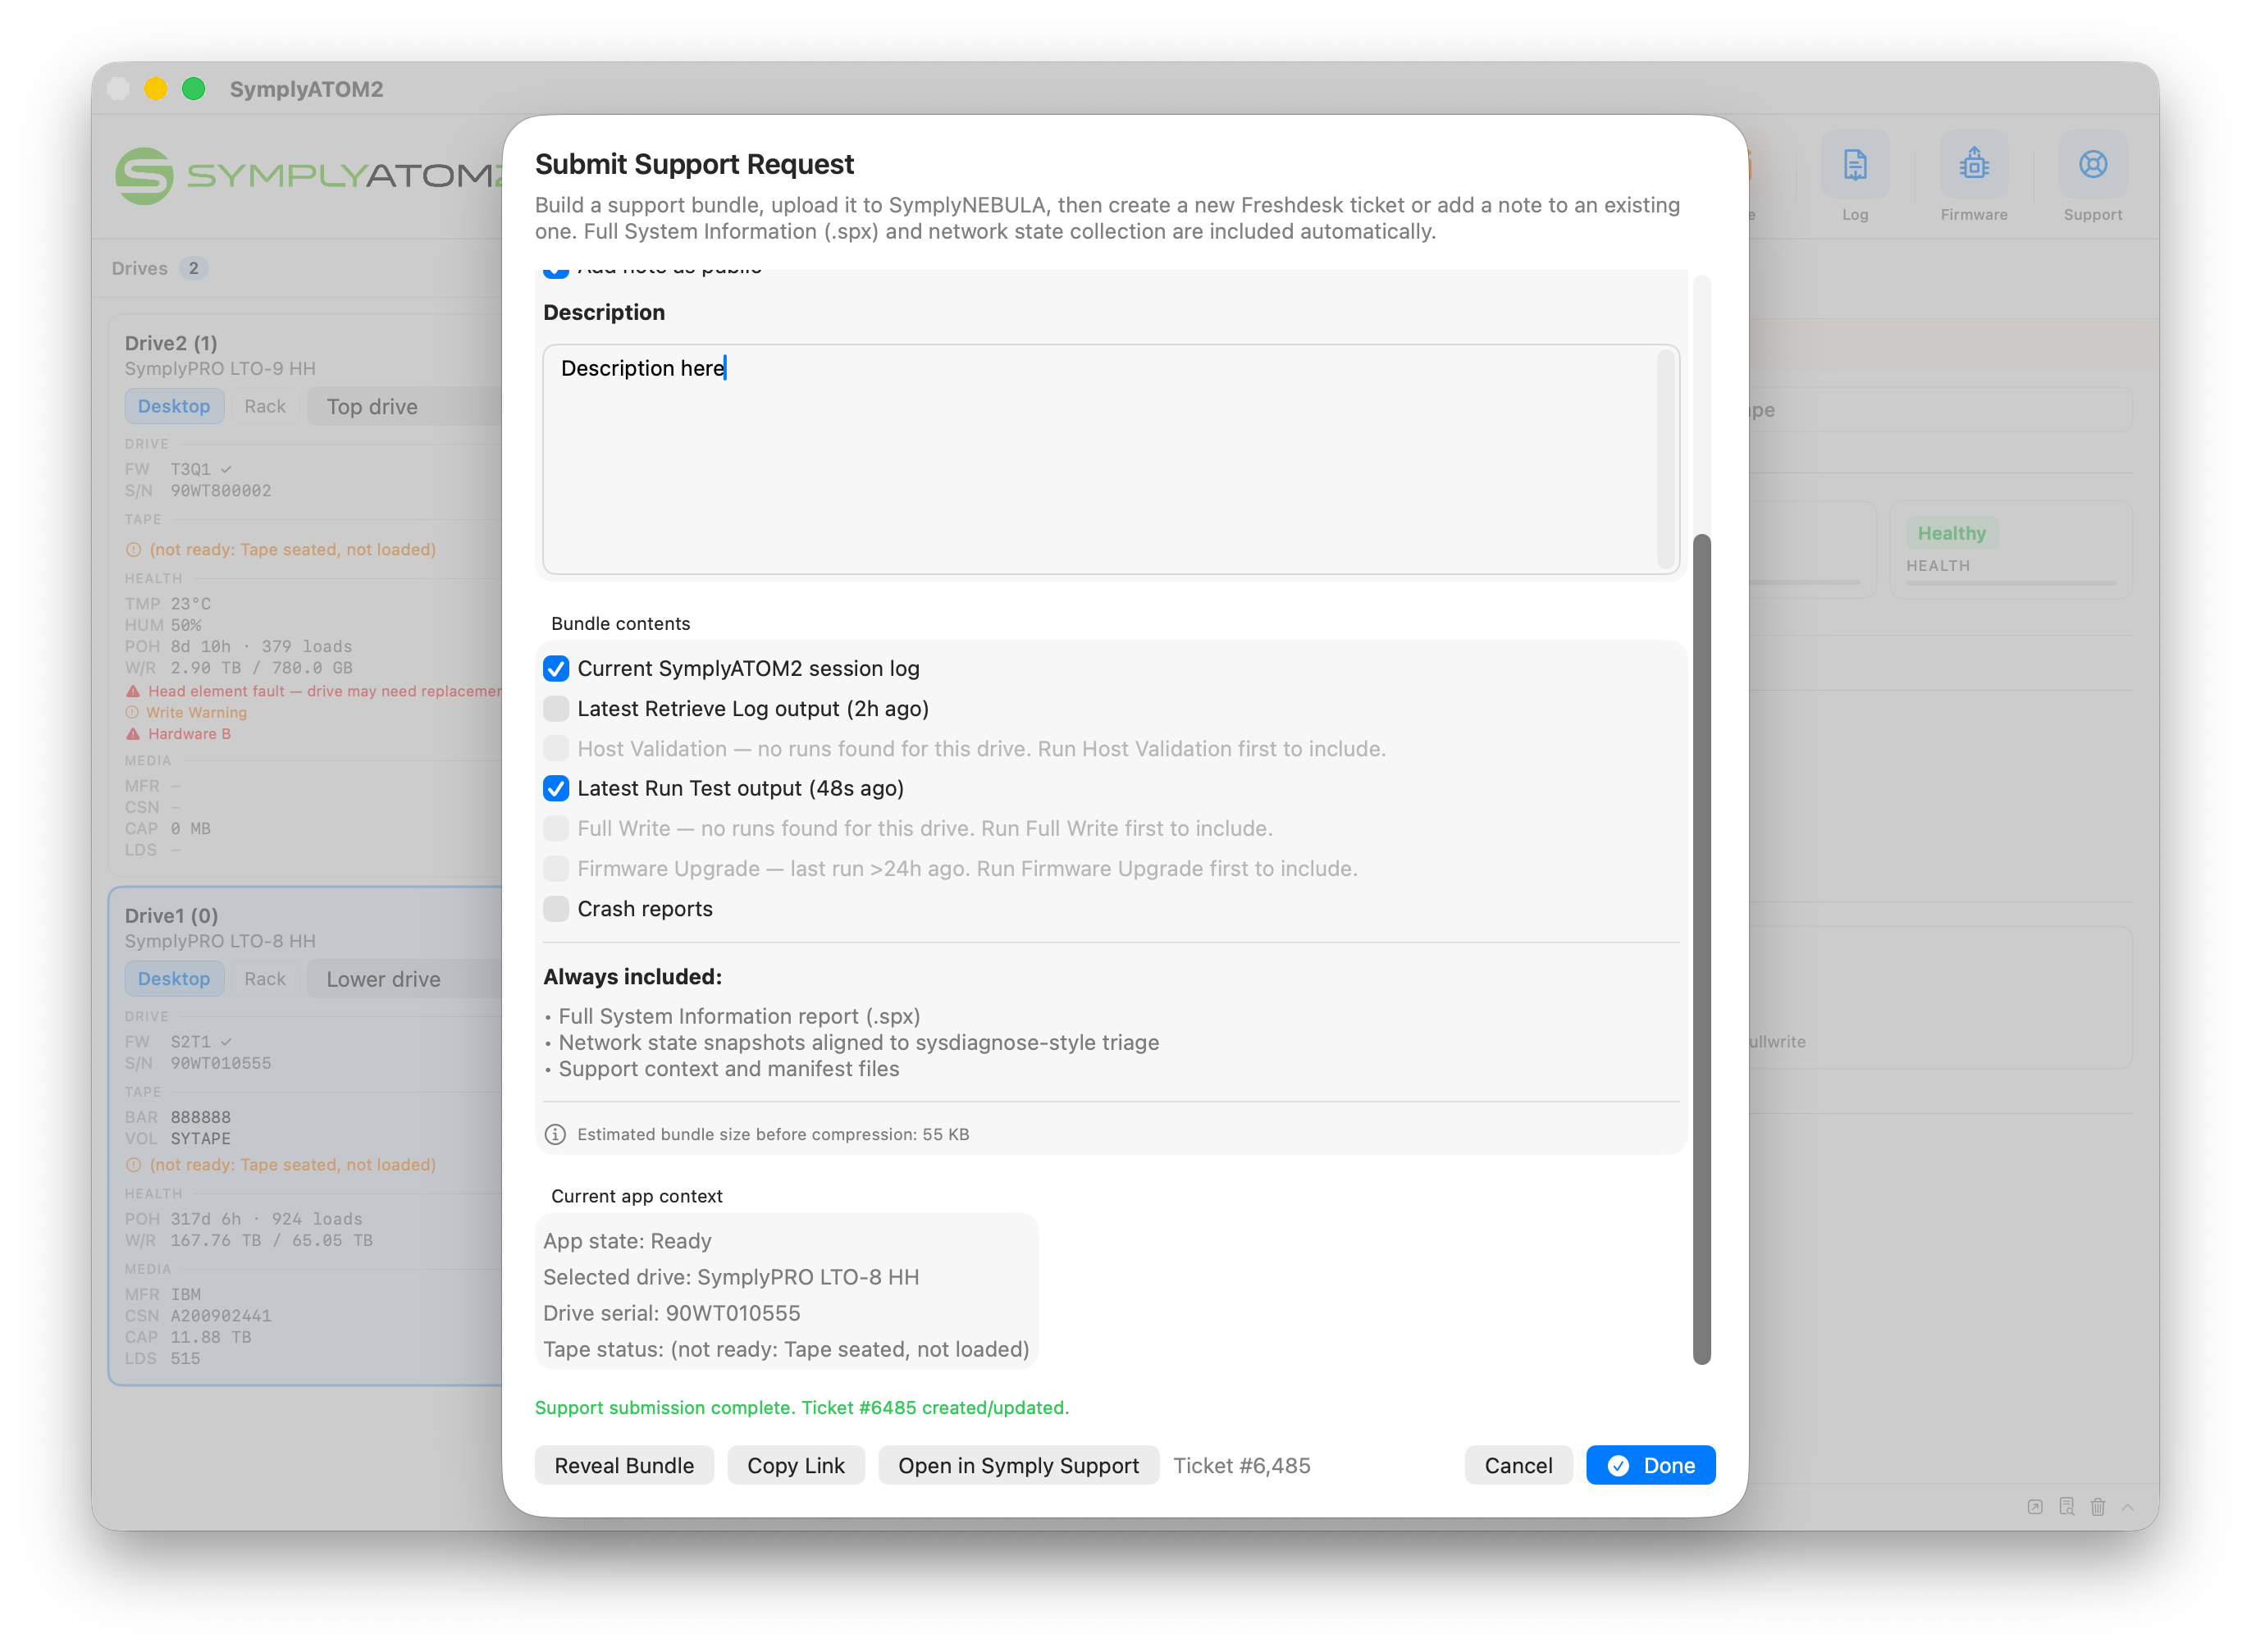
The following actions are available after a successful submission:
- Reveal Bundle — Opens the folder containing the uploaded bundle file on your Mac.
- Copy Link — Copies a direct link to the uploaded bundle to your clipboard.
- Open in Symply Support — Opens your support ticket in a browser so you can track progress or add a reply.
- Done — Closes the window. Symply Support will contact you via email when there is an update.
Frequently asked questions
Does Run Test permanently destroy my data?
Yes. Run Test writes a known data pattern across the entire tape. All existing content is overwritten and cannot be recovered. Only run the test on a tape you are prepared to erase, or on a blank scratch tape supplied by Symply Support.
Can I reformat the tape for LTFS after the test?
Yes. Once Run Test has completed you can use the Format function in SymplyATOM2 to re-initialise the tape with an LTFS partition.
What if the test fails?
The result sheet will show FAILED instead of PASSED. Click Submit to Support immediately — the failure data captured in the results file is exactly what Symply Support needs to diagnose the issue.
What if the Upload and Submit button stays greyed out?
For a new ticket, make sure the Subject field is not empty. For an existing ticket, make sure you have clicked Verify and received a green confirmation before attempting to submit.
Do I need an internet connection?
Yes. The bundle upload and ticket creation both require an active internet connection. If you are offline, use Show Results in Finder to locate the results file and attach it manually to a support email.
Where are Run Test results stored locally?
On macOS: ~/Library/Logs/SymplyATOM2/RunTest/
On Windows: %LOCALAPPDATA%\SymplyATOM2\RunTest\
Each test creates a subfolder named with the drive serial number and timestamp.
If you have any questions please submit a [support ticket]